Maybe it wouldn’t be my first choice, but Chesapeake Light Craft’s original Oxford Shell has its virtues. It’s not expensive. It’s a home-built recreational shell so it can also be tailored for appearance and function. The design is meant to balance performance and stability (which means it ought to move along nicely enough, and it won’t actually try to drown me). The propulsion components are an integrated, industry standard, drop-in package that can be removed for easy transport and — who knows? — used in future hulls, like maybe a wherry or a racier shell. That’s getting way too far ahead of things. Other notions beckon.
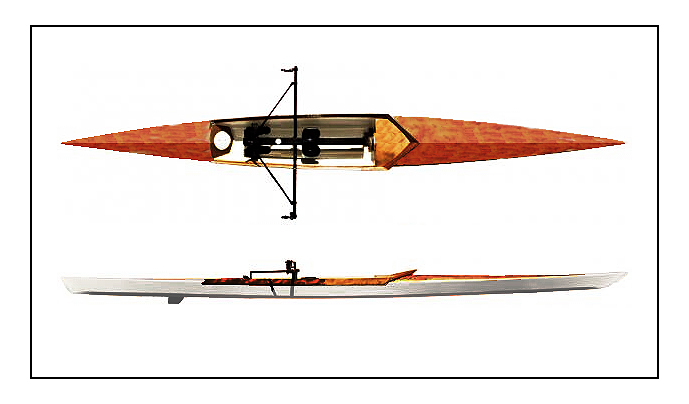
to depict one possible combination of paint and varnish.
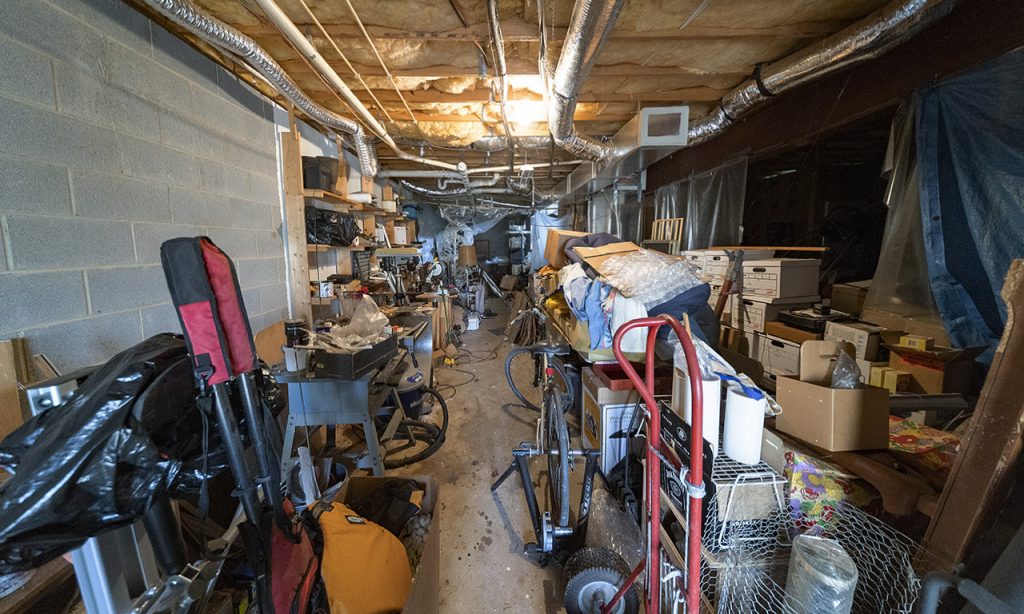
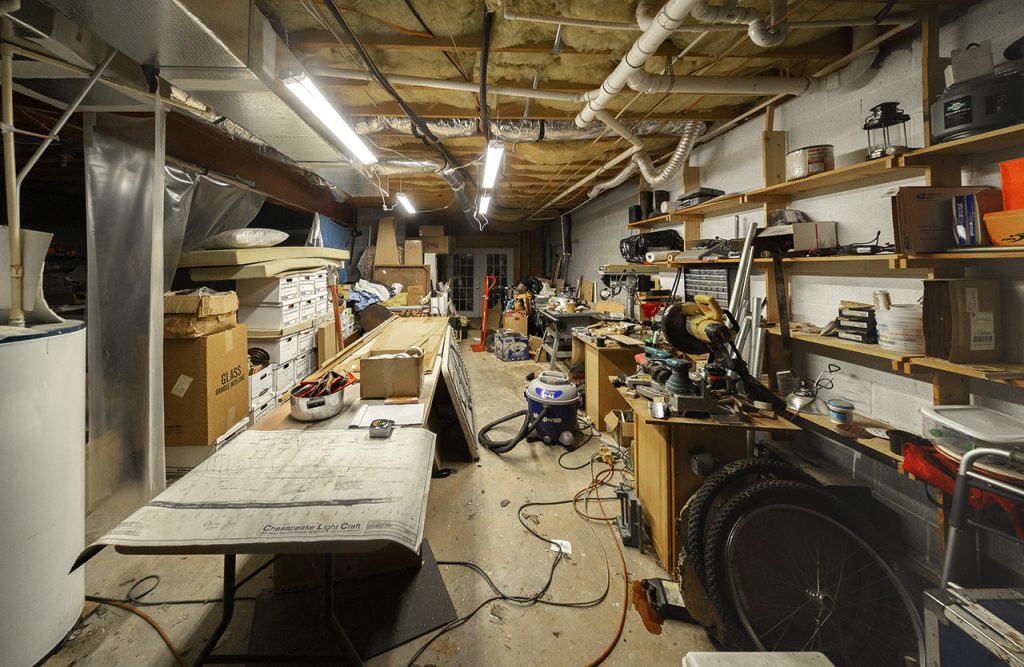
The Boatyard
It’s a walk out basement. There’s a shell kit buried in there. The workshop needs to be declutterated and better lit. Overhead LED work lights wait to be installed. That’s the easy part.
. . .
March 19, 2022
. . .
For more, see “The News” and the
“Building the Boat” category.
The Kit
Chesapeake Light Craft sells all sorts of CNC-cut plywood kits — several kayaks, a couple of wherries, some sailboats, a rowing shell, and a teardrop camper. Each kit is complete with epoxy, filler, and plans (and, let’s be clear, incomplete and in need of a rowing unit, sculls, varnish, paint, tools, and miscellaneous supplies). Mine is the original version of the Oxford Shell. Version 2.0 is slightly longer, incrementally narrower, and uses a built-in sliding seat arrangement. I think there is much to prefer about the original, especially as the basis for a custom build. Somehow, neither the spiral-bound guide to stitch and glue methods nor the detailed instruction book that came with this kit in ~2010 has gone missing:

MAS Epoxy, etc
I’ll need to replace the decade-old epoxy. Maybe the old stuff is still good. Maybe it isn’t. I don’t intend to bet as much time and effort as this project requires on ancient goop that might or might not cure with sufficient strength. [Ha! See “The News” and keep reading.] CLC recommended a gallon of resin and two quarts of slow hardener for this project, same as originally supplied.
Clamps: received wisdom is that a boat shop cannot have too many, also that 4-inch PVC pipes are rich mines for same. I’ll let you know what I find out about both these claims. More notes on tools and stuff will come, probably more than you will ever care to know or remember. [Short answer: the PVC clamps work well, and you do need lots.]
Rigging and Oars
Looming over the project are two expensive items. One is a drop-in Piantedosi row wing — a modular sliding seat, riggers, oarlocks, and stretchers — and the other is a set of sculls. (But check out what happened on and around the 36th Day down below.)
When I was last excited about this project, I bought some dirt-cheap oars of approximately the right length. I figured they would do for beating the crap out of the lake while learning the basics. That still seems like a decent plan before choosing and investing in real sculls. These are heavy! They’ll need to be modified to use sculling oar stops (“buttons”) and sleeves. Stops keep the blades at a constant distance outside the oarlocks and put the me-ends of the sculls (“handles”) where I want them. Sleeves have three flat surfaces that rest in D-shaped oarlocks to guide quick, snappy adjustments between feathered and driving orientations of the blades and keep the pressure of the drive from twisting the handle in the rower’s hands. I can use all the help I can get. Here’s one source of stops and sleeves (there are surely others, and there are probably home-brewed solutions, too):
duckworks.com/martinoli-oar-sleeves-and-collars/
Extras…
Some of these are wild-hairs. Some will find their way into the boat. Most won’t.
- Training wheels? There are commercial versions of small pontoons that attach under the oarlocks, but they’re expensive and unlikely to be used for long. A set of these would make sense for a club or a family, but for a one-off project, building or cobbling something up to make the first few days easier is more like it. It’s also possible that decades in kayaks and the inherent stability of this boat will make this superfluous. Wait and see.
- Hardpoints? You know this is going to be a photo platform (everything is, as far as I am concerned). So think about how to include discrete but solid attachment points near the bow and stern to mount, for example, GoPro sticks and 360-degree cameras. Think very secure, threaded stainless sockets. (I spent way too much time thinking about this, finally came up with something versatile, easy, light, and cheap. Keep an eye on “The News” in the category devoted to building the boat.) Here’s a link to something related in the CLC boatbuilding forum.
- Trim? Ballast? Is that even practical, let alone required. Probably not.
- Does anyone put mirrors on these boats? Backwards you’re going. (Yes, they do. And bicyclists’ helmet or glasses-mounted mirrors get used, too.)
- Does anyone counterweight the sculls? More weight but better balance?
- How about something springy to hang onto the scull handles when you just want to sit a moment? [ETA: yes, it’s called a rigger bungee, a stick goes under the knees with an elastic loop attached to it.]
- There must be rowing-customized data loggers — phone apps or dedicated hardware. [Of course there are. Keywords are “on the water” “GPS” and “rowing”.] Handy cheapskates adapt bicycling computers to collect and display on-the-water stats, just sayin’. A wifi bicycle computer, some borrowed or homegrown ingenuity and a waterproof transparent case for a tablet / display ought to keep me well advised about where I am and how I’m getting on.
By the 36th day
in the boatyard, I had lost my fear of plywood, epoxy and fiberglass. I had learned several ways to make sawdust. The word “fillet” had acquired real meaning.
For a week or so, I revisited a once-mad plan to build my own mechanical parts as well as the hull. I stared at pictures of metals, advertisements for metals, specifications of metals, and at metal itself until I developed the misapprehension that I was about to cram half a ton of steel and aluminum into a very small boat. In rational moments, I reminded myself that the hull was designed for a 20 pound rowing rig, and that I would be surprised if what I was putting together weighed very much more than that (I would be more surprised if it came in even a single ounce less).
I read or heard somewhere on the net that wooden, home-grown riggers often “failed” for lack of rigidity. Hence all the metal. Could it be done in wood? Sure. If I understood what needed to be strong, what needed to be rigid, and what needed to be smooth, had years of experience to inform my judgements and were confident that I could build it just so. I had none of that. The price of metal includes room to be wrong and somewhat klutzy. I do not love wood the way woodworkers do. Metal is familiar. Metal is predictable. Metal behaves.
Along the way from idea to plan, I discovered sliding riggers (contra sliding seats) and thought they’d be not much more complex to build, would involve less moving mass, and offered obvious and very real advantages in a relatively short boat, especially one powered by a rower substantially heavier than the classic model. The reduced pitching, the elegance and efficiency of the more constant speed produced by not pushing my own mass to and fro were attractive. Since I have nothing to unlearn about sliding seats, I thought I might as well start with the action I believed preferable. It’s just as well that I have absolutely no intention of ever racing this boat in a FISA-sanctioned contest, because sliding riggers are outlawed in the second paragraph of almost 400 pages of rules:
In a rowing boat, all load bearing parts including the axes of moving parts,
FISA Rulebook 2017, Part 1, Rule 1.
must be firmly fixed to the body of the boat, but the rower’s seat may move
along the axis of the boat.
I assume that’s for good reason. It keeps a long set of records consistent (see baseball and steroids for the alternative). The fact that sliding riggers presumably offered an unfair competitive advantage suggested that I was on the right track to adopt them.
There are a few commercial sliding riggers. The Piantedosi RowWing is (supposedly) available in a sliding rigger configuration though my inquiries to dealers who advertise it are routinely ignored. Shipping and “accessories” required for installation push the price of most such machines to well north of eight hundred or a thousand dollars were I to find someone to take my money. One wood-based kit came in for about half that, but I just didn’t much care for it (for naive and totally untutored reasons). I thought, I’ll just start sketching, incorporate some ideas, refer to working specifications, mix and match needs and capabilities until I have something plausible and semi-elegant. And I’ll have some fun while I’m at it. I thought maybe I’d actually build it. I did.
Details, oh so very many details, are over in “The News” beginning around Day 31 of Building the Boat. Go there if you’re keen to suffer through the design steps with me. I’m pretty sure I have a working scheme in mind, and the materials are coming in steadily.
Look, truth be told, a great many aspects of this sport are pitched to people with budgets and ambitions far beyond mine. That combination leads to a market filled with $300 seats, $500 covers, and $1,200 riggers. Take a lesson from telescope making: I can build something satisfying where “satisfying” addresses my wants and needs while not in any way suggesting “state of the art.” Neither does it suggest “inadequate” or “marginal.” “Sufficient unto the purpose” is the design goal. My boat and its components will not depend on exotic materials or sophisticated fabrication techniques. Individually and all together, the boat and its parts will weigh somewhere between a little and substantially more than what could be purchased complete. It will lack that chic Lexus polish and will cost a fraction as much as anything I could buy off the shelf (and an even smaller fraction of anything I couldn’t buy off the top shelf). Certain items aren’t worth quibbling over. Buy the oarlocks; buy the sculls (ha! keep reading). Building my own rigger should save much more than enough money to buy a nice set of sculls once I know what I want and what matters.
Mine is a recreational shell. I expect that it will work just fine with pretty much any set of at least marginally reasonable design decisions. The cosmos and the water may prove me wrong, but so far, so good.
The most unusual aspect of this boat is its sliding rigger. So I can’t leave that topic alone without belaboring it a little more.
Some background
sliding riggers were briefly legal in FISA competition. Here’s a YouTube video of the 1982 finals in the World Championships for single sculls. Every competitor used a sliding rigger. Note the lack of porpoising, the steady pitch of the hull throughout the stroke. (The designer possibly behind this innovation was Volke Nolte. Here’s an interview with him that I recently ran across.) The winning boat covered 2 km in seven minutes four seconds; first, second, and third finished within a boat length. The sport has moved on since then. What was a world championship time forty years ago was silver medal performance ten seconds off the winning pace in 2020. As of 2017, the best 1X 2km time is 34 seconds faster than the winning time clipped above (“1X” is rower-speak for “single-seat”). That modern records have progressed dramatically says nothing bad about the banned technology.
Here is another video of a modern, commercial sliding rigger mounted on a 12-foot paddle board. If this scheme produces smooth, steady propulsion in that application it should be even smoother in the hull taking shape downstairs.
The Aim
This is what I want from all this. This is a classic, sliding seat boat, but the goal is the same. The lake even looks like “ours.” I prefer to watch this with the sound off, but your mileage will, inevitably, vary.
As you were.
For the blow by blow, check out The News.
See especially the category, “Building the boat.”
Other expected categories:
“On the water”
“Trying not to drown”
“Figuring this thing out.”