I hoped that stitching the bottom panels to the side panels would be revelatory, that all would become clear as the process progressed, but I am flummoxed. I verified the measurements; I pushed here and there; I took the spreader out and put it back; I dry-fitted one of the bulkheads, and I do not see how these panels will fit together (without a lot of force and compression). Maybe that’s what it takes. (Note from the photos in the kit instructions that the aft bulkhead is installed at about a 45-degree angle to the bottom panels, and I forced it in there square. Things are not quite as hopeless as they appeared earlier.)
I did discover a potentially sanity-saving solution to ease the placing of stitches between the side- and bottom panels. So there’s that.
Consider the way the panels could fit together. I could aim for any of the first three alternatives. The lower right sketch approximates how they will fit when finished. So I elected to aim for an original position that can be readily pulled into the finished arrangement. That would be ALT 3 in the following sketch:
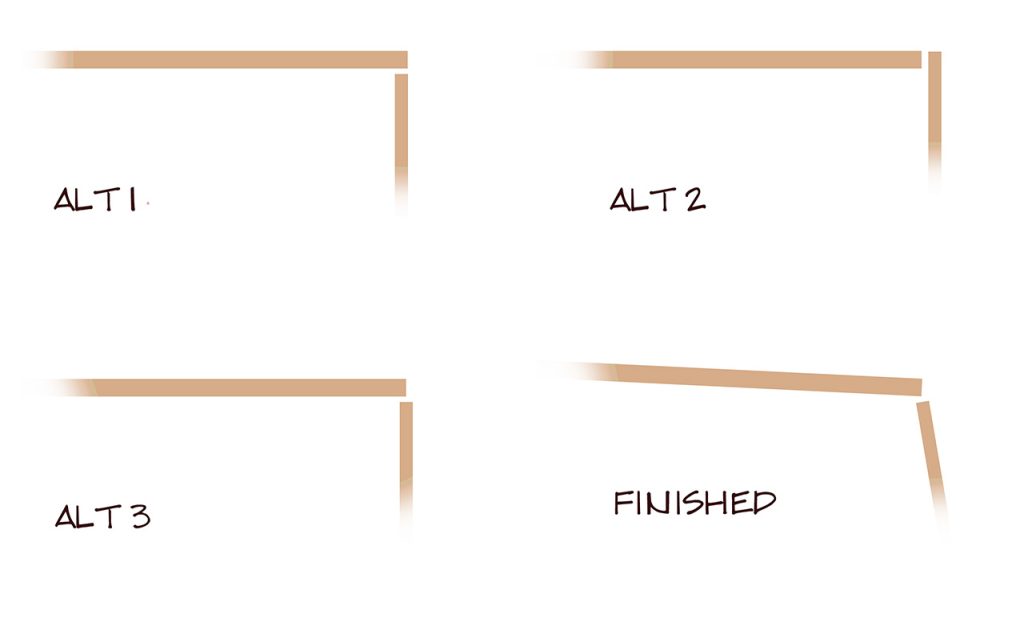
I should be so lucky: if the panels meet up within a quarter inch from stem to stern, take it! But this is the idea and the ideal.
The wood on the top of these sketches (a bottom panel) is 4mm thick. The side panel is 3mm thick. That’s thick enough that holes drilled through the wood provide guidance to the copper wire being run through them. Holes drilled normal to the surfaces will require that wires make a right-angle turn to pass through the second hole. Remember that the holes are just 3/8 inches from the edge of the panels, so the bend would have to be quite sharp. I tried reaching under and pushing the wire toward the second hole; I tried making sharp bends in the wire prior to insertion (and then reaching under and pushing). Sometimes something worked, but most times it didn’t. A lock picker would have no trouble with this, but I am not one. This evening, a solution finally occurred to me: drill the holes at approximately a 45 degree angle:

Those drawings are are approximately to scale (18ga wire is 1.2mm in diameter, and a 1/16 hole is 1.6mm; 3/8 inch is 9-10 mm). In practice, I drilled down from the top of the sketch and let the drill bit come through the side panel where it would; it was seldom more than 1 or 2mm from the scribed line. Where I had already drilled straight holes, I reamed them out to the 45 degree tilt. This made the “stitch” in “stitch and glue” much easier. You’re welcome.
I’ve managed to break three 1/16 drill bits so far on this project (two were through stupidity but one broke because the wood shifted). I still have two, but Amazon has lots (15 are on the way). It’s apparent that I am going to use more copper wire than came in the kit since I’ve had to redo a lot of stitches, will probably have to redo more, and I am increasingly profligate in the lengths I am using (the better to produce a variety of bindings that range in tightness from “just keep these pieces somewhere close to each other” to “don’t let these move at all”). Amazon has lots of copper wire, too. Soft 18 gauge is what was supplied, and that’s what I’ve ordered. More brass screws for the decks are on the way, too. The ones I auditioned look like they will do just fine (total for screws, copper, tape, and spare drill bits to add to the project ledger: $51).
Now, I have to figure out how these panels are ever supposed to mate. I think the ends of the boat do need to be very firmly attached to each other (the plans suggest screws) so that applying substantial force to the side panels will not tear them apart. The side panels ought to be stitched to each other at the ends to establish the cross-section. Then it’s going to be a matter of bending / twisting the side panels inward to meet the edges of the bottom panels. (When it’s time to add epoxy to the ends of the sheer clamps, the hull will be upright and the sheer clamps easily accessed.) The intended cross-section differs pretty radically from what’s on the table right now. The bulkheads will set the profile. I wonder if strapping tape has a place in this game? I ordered some for general use and for experiments with the boat (three rolls are included in the ledger item above).
All in all, day nine was pretty frustrating except for that one useful insight about drilling holes in the hull of a boat. Things will go better
Tomorrow
after I lock the ends of the sheer clamps together (without epoxying them) and get more generous with copper wire.