Now at last I have to commit to some decisions about the rowing machinery and the layout of “the office.” Here’s a diagram from AngusRowBoats.com that ought to help keep terminology straight. That site acknowledges that some lunatic might be making his, her, or their own sliding machinery and provides some hints and recommended dimensions. On his, her, their, and especially on my own behalf, I say, “Thank you very much.” Their diagram is for a sliding seat rather than a sliding rigger, but it’s close enough to be useful.
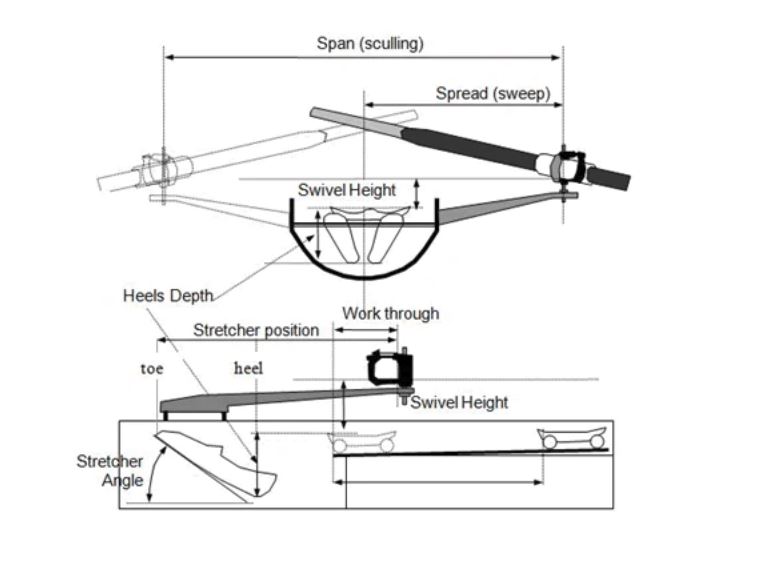
Stretcher position, tips of toes to the line between pins: 50-65cm (50-55 for their systems). That’s 20 – 25 inches.
Heel depth (aka Stretcher Height), top of seat to back of heel: 15-20cm (greater for comfort, long distance rec). Call it 6 – 8 inches.
Stretcher angle: 40 degrees, more or less; more upright for comfort in recreational boats.
Swivel height, top of seat to oarlock swivel: 14-18cm. (5.5 – 7 inches)
Average seat position for a sliding seat, fixed seat for a sliding rigger: “about 2 feet back from the geometric center” of the boat. The boat is 20′ 7″ so the seat would be somewhere around 11′ 4″ to 12′ 4″ from the bow.
So the recipe goes something like this:
- Position the seat with respect to the length of the boat.
- Mount the rigger so that full (or almost full) forward slide puts the pins ~7 inches forward of the front of the seat. More “work through” is OK if the range is available; put a stop on the mechanism if needed.
- Put another stop somewhere safely aft of my full extension. Do not let the rigger hit the built-in limits of the slide on either end of its travel — it will be tedious to replace.
More about that later. You’ve been warned.
As for height, with the rigger resting on the splashbox, the line between the pins is about 9 inches above the bottom of the boat. This represents the lowest possible height for the rigger. The fulcrum would need to be a couple of inches higher to let the back of the rigger clear the splashbox when the rigger is tilted to produce the needed pin height. The alternative would be to not tilt the rigger and just mount it high, but that requires a taller sliding unit, adds weight, raises the CG, and does not seem to be the way it is done.
Never forget the first rule of amateur telescope boat building: if you can’t make it precise, make it adjustable.
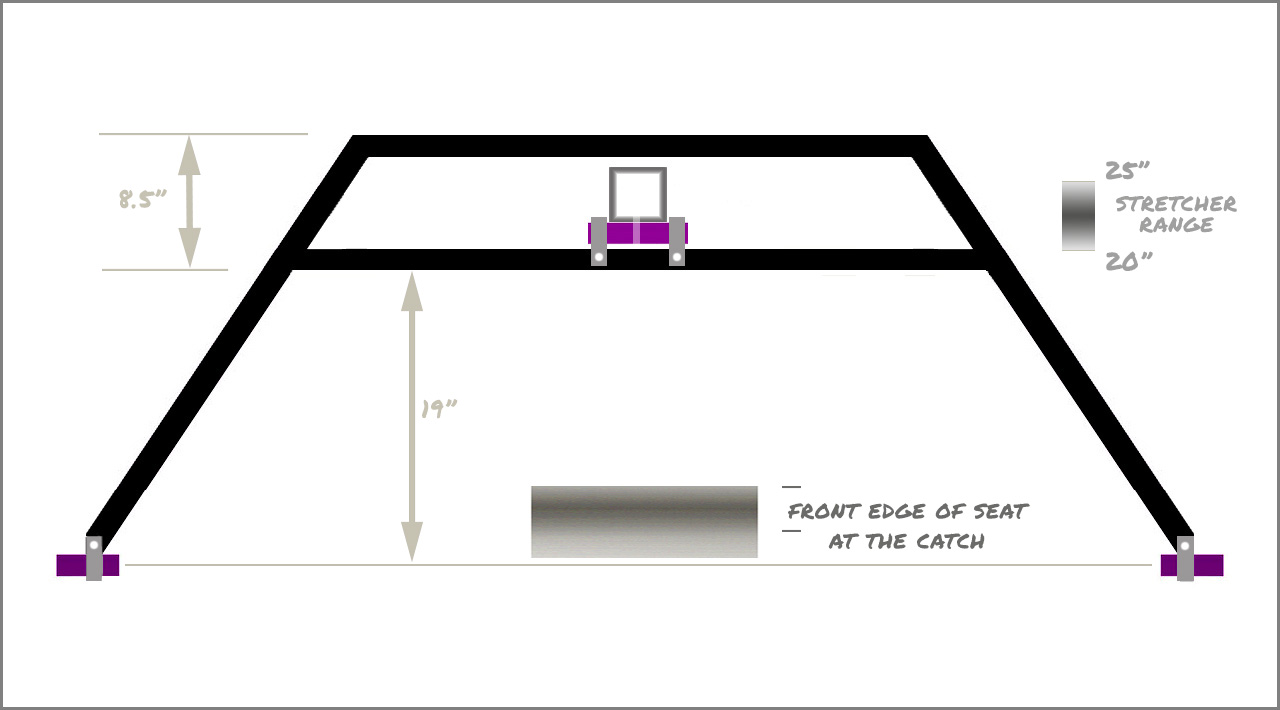
Here’s my first decent unpacking of the vertical concerns described above sketched into a plausible profile of the office.
The seat needs to be placed 6-8″ above the heel cups of the stretcher (the higher the better for comfort and long distances, so I’ve skewed the range to 7 inches plus a pad). And it needs to be 6-7″ below the oarlocks. Right? The vertical dimensions are all keyed to the height of the heels; who knew? This quickly turns into one of those word problems where you know more than you think you do, where some critical dimensions need to be inferred from the givens, and it helps to identify a couple of invariant aspects. It will probably be worth redrawing all this from first principles to be sure some erroneous dimensions and assumptions haven’t been incorporated while working it all out (e.g., is the seat too low? does the range of pin heights allow the seat to be that low, does it make sense to build it there and let a seat pad raise it if and when needed? could the heels be slightly lower? or maybe it’s fine just like this).
This is going to be tedious. The keel line is self-explanatory. I assumed the heel cup would be 2″ above the keel. I sketched in a plausible position for toes based on that assumption and a slightly less than 45-degree stretcher angle.
There are certain fixed features: the keel line and the top of the splash box. Upon assuming a height for the heel cup, everything else follows. The blue line is invariant as the slider moves: it is the line from the center of the stretcher to the fulcrum of the rigger. (The stretcher should be adjustable several inches fore and aft, but for any particular rower on any particular outing, the line between those two items remains constant.)
The gray block “top of seat” represents a plausible range of heights with room for a pad. It’s where the actual structure should be. Since the height of the pins is specified as a range above the seat, the ranges combine into the larger gray area at the top of the drawing. Both should be readily adjustable so do not sweat fractions. (The seat height is temptingly similar to the height of the sheer clamps: could I just rest the seat on them or on a second similar “shelf” immediately below them? I’ve ordered a rowing pad with the notion of doing the former for initial sea trials and refining positions after I fall out a few times (or put in a few km of actual rowing).
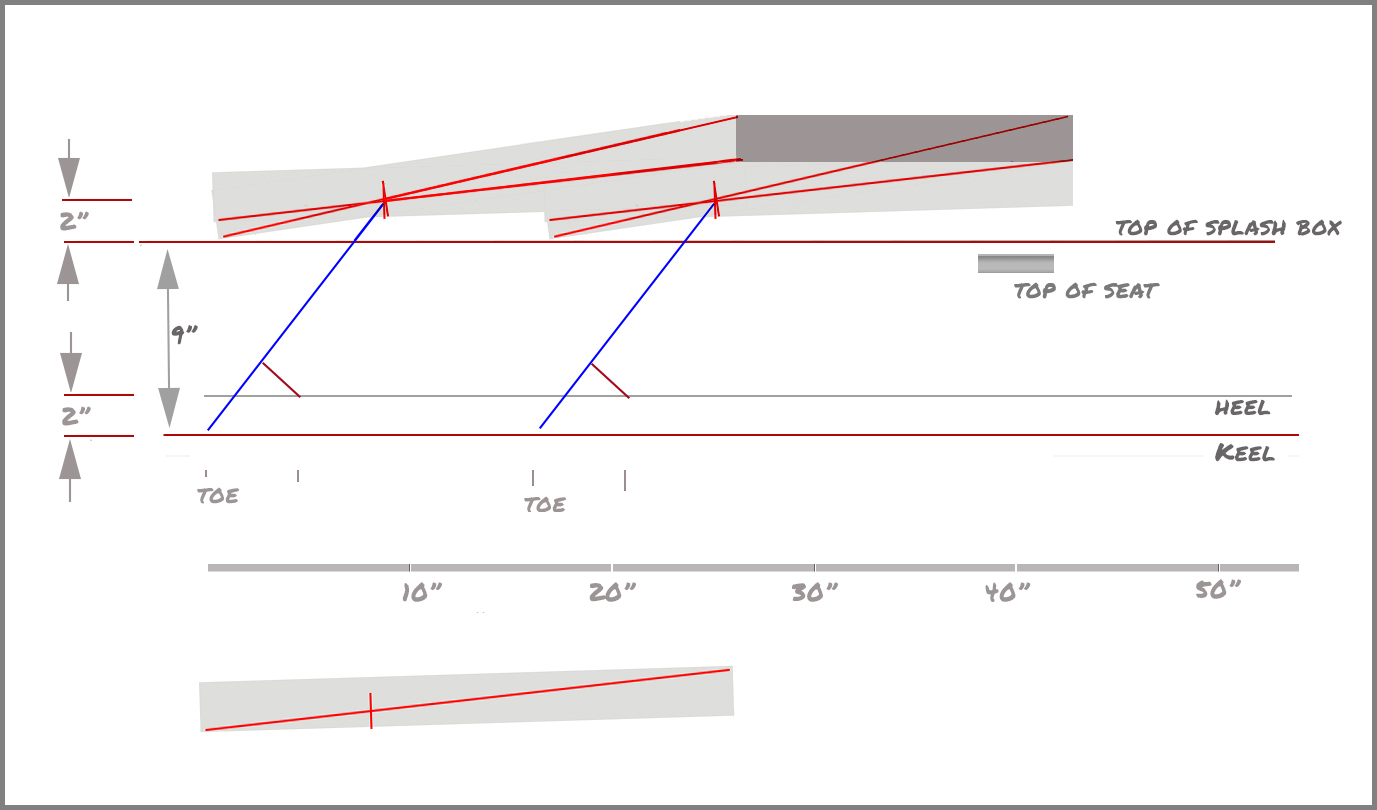
The “work through” is assumed to be 5-7 inches and determines the forward limit of the rigger and that, in turn, determines the forward limit of the slider. The total sliding range is generous; it ought to accommodate those with long inseams and the arms of orangutans. Meanwhile, I, with my penguin frame and old man’s arms, hips, and back, ought to find plenty of range to spare. No one has to use the entire range; it is not required to hit the stops, and it is better from a maintenance perspective not to.
The actual height of the pins is set by two factors: the position on the vertical part of the slider to which the rigger is mounted and the angle at which the rigger tilts. The lowest part of the rigger’s frame must clear the top of the splashbox; the uppermost part must accommodate the highest plausible pin placement.
The gray block at bottom with the red lines represents the rigger at its steepest useful angle — good for copying and pasting over the drawing to see what’s going to conflict. It’s roughly 19 inches from the mounting point to the line between the pins along a horizontal line, and about 8 inches from the same point to the back of the rigger frame. There’s a good bit (3 – 5 inches?) of adustability available to set the the pin heights by tilting the rigger. To complicate cogitations (and simplify everything else), the mounting point of the rigger is about 1-1/4 inches below the frame; that is not shown.
As a rule of thumb, it appears that the fulcrum of the tilting rigger is the same distance above the splashbox as the heel cup is above the keel.
I told you it was going to be tedious.
Note that the much-discussed slope (1:20) built into sliding seat rigs is shown in Angus Row Boats’s drawing but not in mine. I do not intend to incorporate it. I may (I probably will) build some functionally similar effort-recovery feature into the slide, but it will not be a gravity assist. I need to get out my slide rule and my high school physics book and work out (a) how much energy pushing a rower up that slope borrows from the drive to assist in the recovery and (b) how to implement a functionally similar system using an elastic cord. The fact that I will be sliding about 25 pounds back and forth rather than 200 may make the whole issue moot, but I want all the help I can get.
Slide rule? Really? Wolfram Alpha says that 200 lbs lifted 1 inch against 1 g acquires 22.6 joules of potential energy. Call it 20. Good luck finding the right parms to invest predictably a similar amount of energy into a spring/bungee cord across, say, ~18 inches of stretch. I see some experiments coming along to get the (Ruth) McPherson effort recovery system — MERSY? — working well. It’s not a lot of force. In my boat, I am not moving my mass, only the rigger. Call it 25 pounds. I’d still like the slide to return to the catch without my having to do all the work to pull it back. But I don’t need 20 joules for that. I think this is going to be a matter of trial and error (and error and error) until it works as intended. (Note that 20 joules :: 20 newtons :: 4.5 lbs. A bungee cord that will stretch 18 inches under a load of 5 pounds would be a good start for the original problem and would probably be significantly stronger than needed. Of course, this energy also assists in swinging the sculls back toward the catch, so perhaps the total energy involved in the sliding seat is not as different from that in the sliding rigger as first supposed.
Repeat after me: “If you can’t make it precise, make it adjustable.” / “Si vous pouvez pas le rendre precis, rendez-le ajustable.” / “Si non potes illud praecisum facere, id accommodatum fac.” / “Wenn Sie es nicht prazise machen konnen, machen Sie es einstellbar.” / “Os na allwch ei wneud yn fanwl gywir, gwnewch yn addasadwy.”
See “rigger bungee” for another use for a bungee in a boat (it holds the handles of the sculls so the rower can turn loose long enough to wipe sweat or just sit).
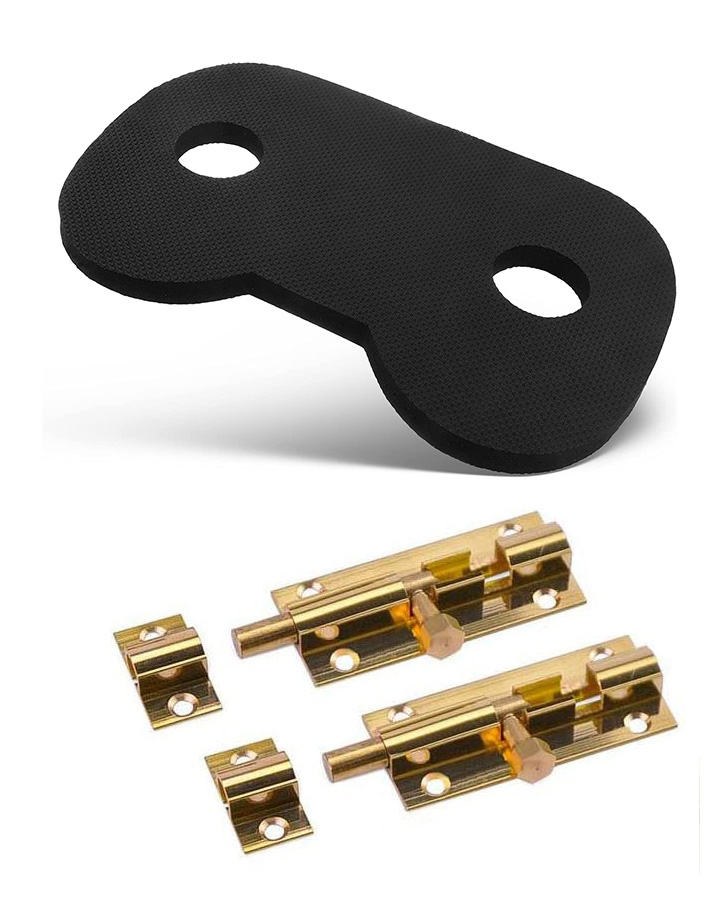
Today I planed down some oak to use as seat thwarts. On the way are several small items: a few brass barrel latches with which to fix the seat’s position fore and aft; a seat cushion made for on-the-water applications; and plenty of 4-inch wide velcro strap stock to use as part of functional (if not exactly elegant) stretchers (and who knows what else).
All the pieces to finish the boat are here or will be here in a few days. It’s put up or shut-up time!
I’ve been wasting way too much time trying to come up with something that could be used to hold the slider in one place so that the boat can be used as a fixed-seat rowboat — the better to see how it sits, to find the center of bouyancy, to get a sense of How Things Work without the added complexity of the slide, and so on. I drew, sketched, and brainstormed clamps, holes, and cotter pins. And when I was satisfied that I had something in mind that would work, I realized that I had reinvented the oar lock. Why do you suppose it is called that? Just mount a pair of oar lock sockets (make ’em or buy ’em) on the sheer clamps and drop pins from the rigger into the socket. It’s temporary; don’t go nuts making it elegant. I mean, if it’s fun, fine, but there are better things to lose sleep over.
Just don’t move your feet.
In the meantime, “Construire le bateau; le mettre a l’eau.” (Build the boat; put it in the water.)
Day 75a
Fourteen or fifteen days since the last “day.” The Halloween Party happened. The barrel bolts pictured above are tiny! I’ve ordered more appropriate ones. Time’s up. The slide mount goes in today. This day deserves its own page.