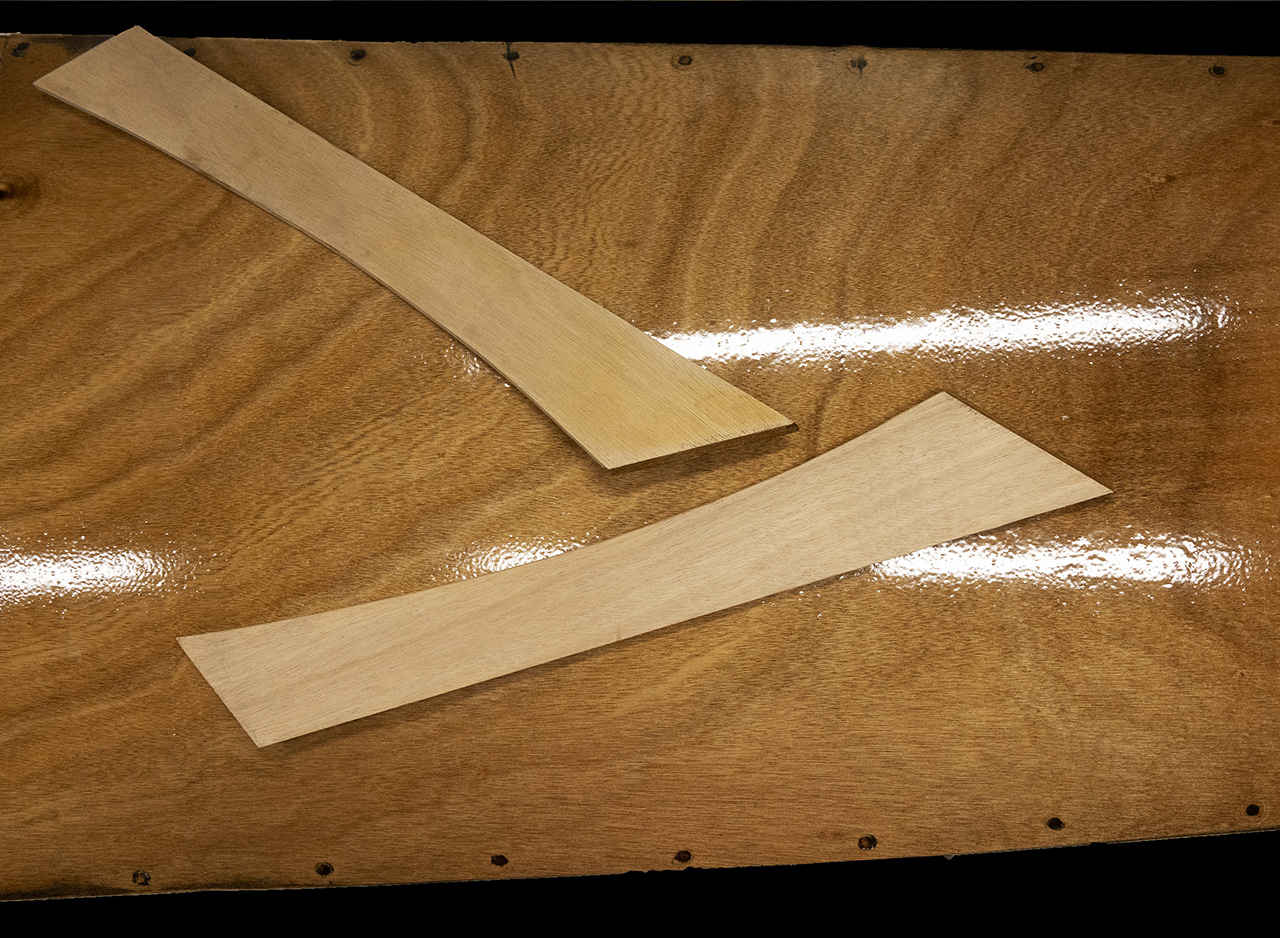
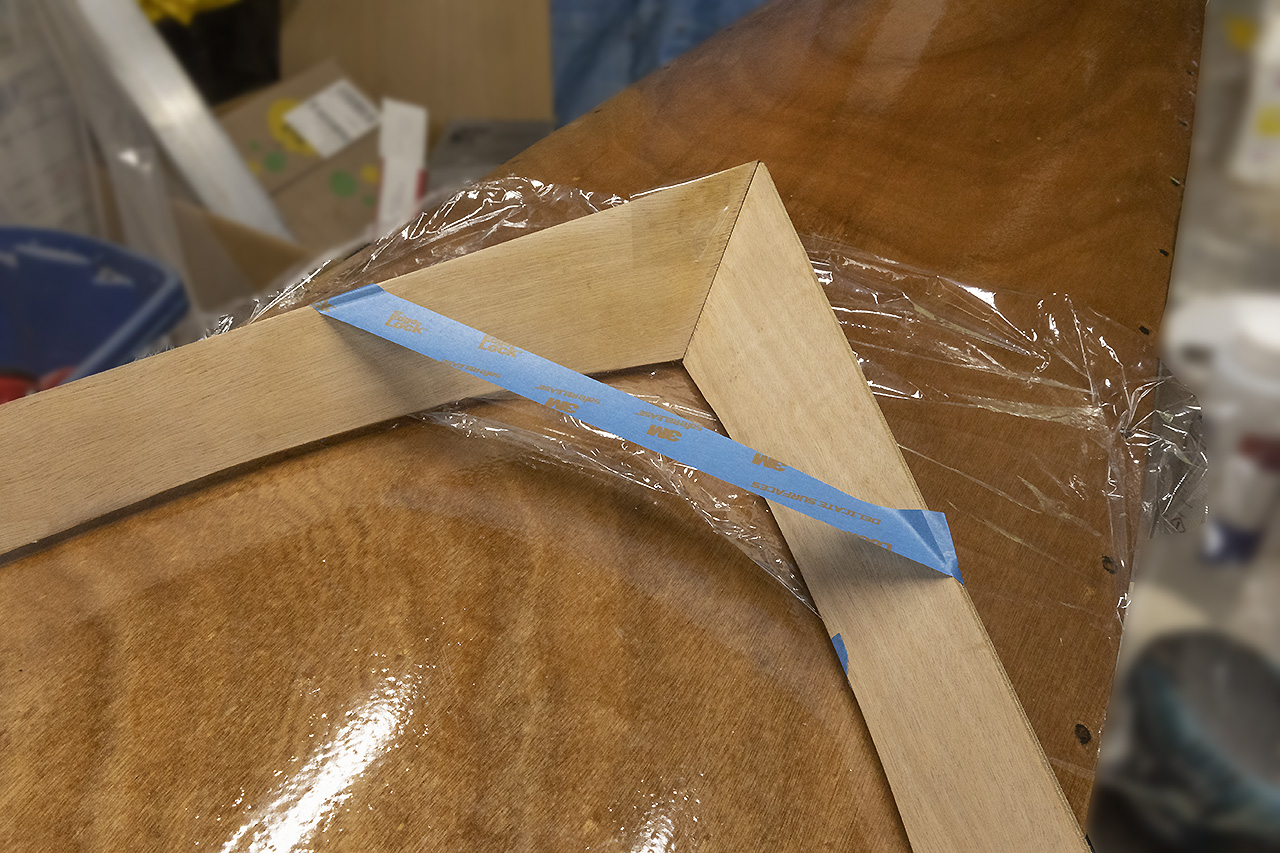
The instructions say that the coaming is “tricky.” I dry-fit the bits that sit on the foredeck several times and adjusted their lower contours. I avoided doing anything that would compromise the front joint which is beveled on at least two and possibly three planes. I thought it best to put that part of the coaming together, treat that front pointy bit as a single piece, and then deal with the sideboards, but this proved complicated. I couldn’t figure out how to hold the pointy pieces together until they bonded. I tried Gorilla wood glue and thickened epoxy. I made a mess each time. I cleaned that up with the sander. At least I was left with a sealed edge to work with.
The instructions show an engineering marvel — braces and flying buttresses of tape going every which way. I decided to try something novel. What if I had a can of PlayDoh?
I could use PlayDoh to hold the front pieces in the proper alignment. Tape behind the joint and at the bottom of the pieces, then set it on the deck on top of cling wrap, and adjust it until the angle is right. Drizzle epoxy over the joint, and when it cures, apply a fillet to the inside angle. (I am writing this with far more confidence and authority than is merited. The boat you build in your head generally presents fewer problems than the one you build in the basement.)
I didn’t, in fact, have a can of PlayDoh. But the intertubes provided a recipe for “no-cream-of-tartar, no-cook” faux PlayDoh. In case you, too, find yourself in similar need, here’s the recipe. This comes from “https://empoweredparents.co”.
- 2 cups flour
- 2 teaspoons vegetable oil
- 1/2 cup salt (!)
- 1/2 to 1 cup water as needed
- Mix the flour, oil and salt in a bowl.
- Add water slowly while mixing the dough.
- “It’s easy to add too much water as the mixture seems too dry until mixed thoroughly. If you add too much, simply add more flour to get the right consistency.”
- Store in a sealed container.
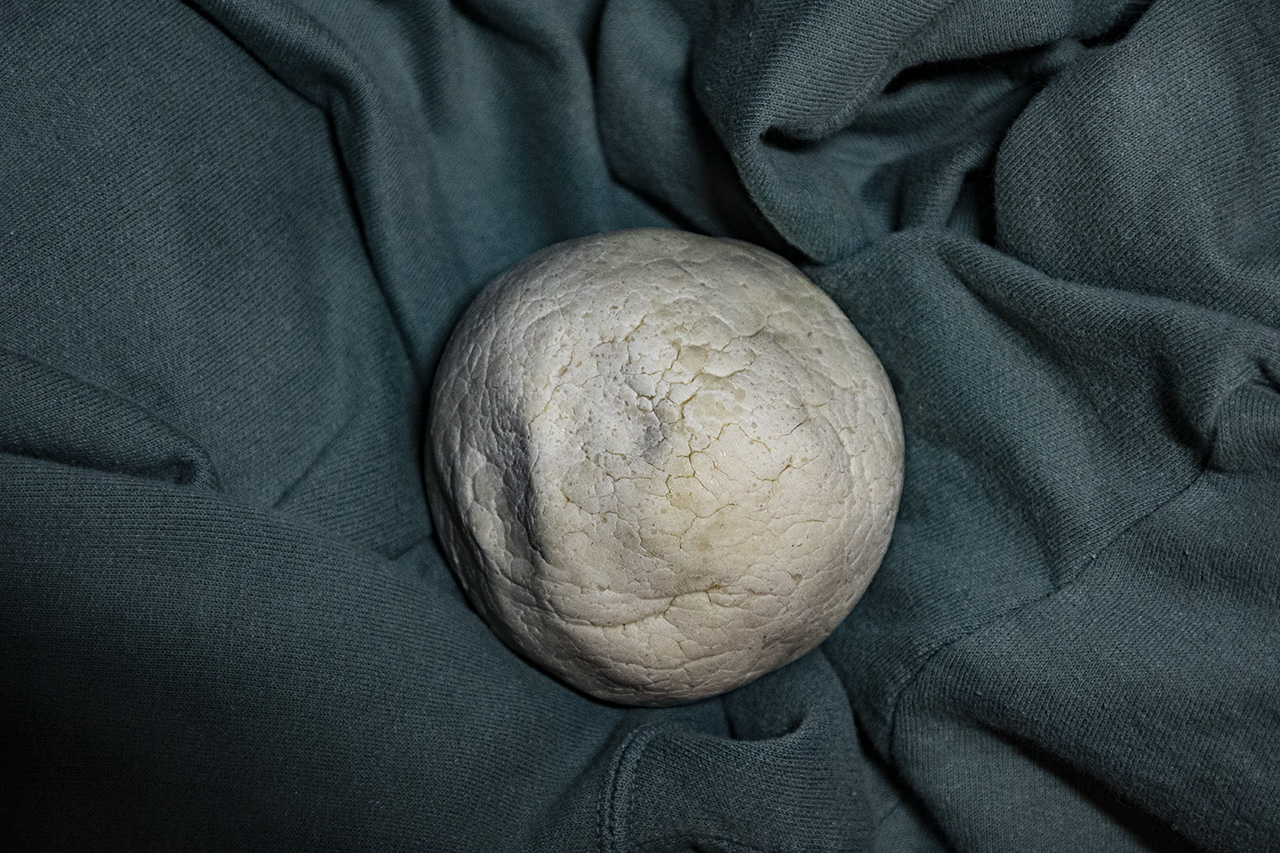
And lo, thus did all things come to pass. After mixing up the incredibly salty biscuit dough, I didn’t think I was going to need it. When I put wide cellophane tape around the outside of the joint and folded the hinged pieces together in preparation for this master plan, all it took was a piece of painter’s tape to hold the “arms” in place. Good deal. I began dribbling epoxy barely thickened with cell-o-fill along the inside of the joint making sure some goop worked in between the mating surfaces. While the epoxy thickened, I kept dribbling enough to make a modest fillet.
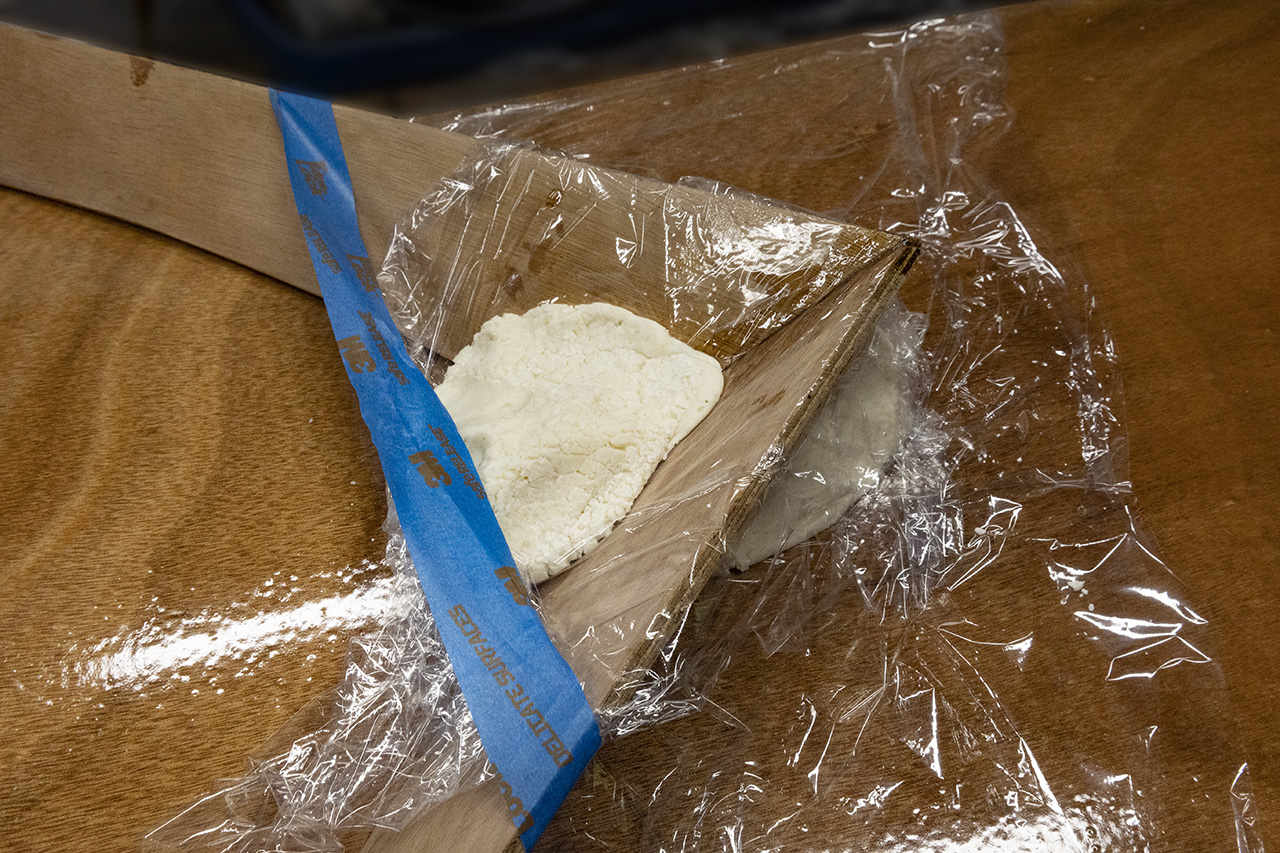
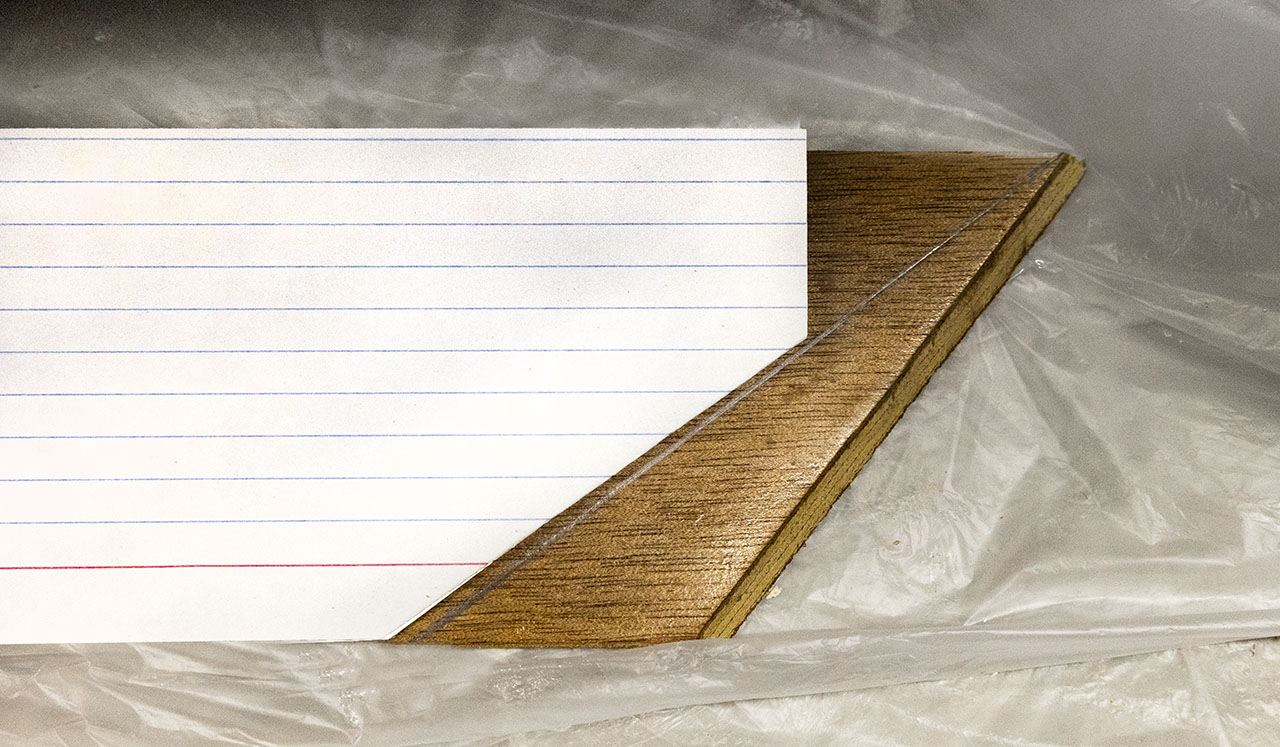
Saran Wrap protects the deck from the epoxy yet to come.
Everything looked good, but in about ten minutes, it became plain that the joint was not being held firmly enough. There remained an uncontrolled degree of freedom: the arms rotated slightly with respect to each other. Maybe I needed a piece of blue tape pulling the bottom edges together, too. Fortunately, the magic holdum had not set up tight.
I put a layer of Saran Wrap around a wad of fauxDoh and jammed it around the outside of the joint. Then I restored the alignment and pressed the joint into the wad until a support surface formed. I wrapped another wad of dough in plastic wrap and pushed it down inside the joint to press and hold the joint down in its doughy cradle. Finally, I added tape near the vertex of the arms to provide compression to hold the mating surfaces together — the FauxDoh on top wanted to push them apart.
When the epoxy in the mixing pot cooked off, I walked away for a few hours. Whatever I did was done. Four hours on, all looks good. I won’t declare success until I unweight and unwrap the joint and find it secure.
Several hours after that, I removed the Saran Wrap and tape, wadded the fauxDoh back into its mother glob, and applied a generous fillet of wood-thickened (peanut butter) epoxy to the inside of the join.
Day 66
I meant to seal each of the long splashbox pieces on the side that will be epoxied to its respective gunwale. Predictably enough, I sealed the other side. It needed doing eventually, but it could have waited. So I sealed the proper side this morning. The surface I sealed yesterday shows alligator-texture similar to what the decks did. Contamination was/is everywhere after such long storage; this bit of it is not due to my exuberance with stain and mineral spirits. More and more. I am thinking a semi-gloss, satin, or matte finish is in this boat’s future. The varnish I bought for the project is semi-gloss. If it is too reflective, I can scuff it up or apply a top coat of satin or matte. That is an issue for some future dawn.
The sharp pointy bits of the splashbox are solidly attached to each other. But that fillet was ugly. I mixed up some micro-balloon thickened epoxy, arranged the glued up pointy bit on some fauxDoh so that the old and messy fillet was level, then poured / spread / smoothed a fresh flood over the old mess. It self-levelled nicely. It also scuffed well and more or less sort of almost kind of matches the color if not the grain of the arms. I’ll put another coat over the whole inside surface and maybe do something else to hide, decorate, or disguise that joint.
The angles where the side panels of the splashbox will eventually meet the pointy bits (which now resembles a mid-century Danish boomerang) are all askew. That is not my doing, but it will be my fixing. I’ll need to make the angles at the forward end of the side-mounted splash panels considerably more acute while retaining the bevel across their 6mm thickness.
It has not been a great day in the boatyard, but it is ending better than it began. I’ll get to play with the compound miter saw to fix the sides of the splash box (I’ve always used it for single miters). Here’s hoping that I don’t have to try so many times that the sides end up too short.
In other news, I’ve ordered some stainless fittings to hold a seat; if my schemes do not pan out, I’m only out $8 for those. If they do, I’ll have a light, easily modified, drop-in seat.
Day 67
It’s not as if there are myriad options about where the splashbox components have to go and how they’ll need to be attached. So I made an overt effort to stop overthinking and proceeded on. I tacked the boomerang to the foredeck using epoxy made moderately viscous with a small load of cell-o-fill. I also deployed lots of painter’s tape, some for masking, some to suggest firmly that the boomerang remain in place while I messed with it. I dribbled epoxy along the entire joint atop the foredeck, cleaning up as I went, dabbling the ever-thickening mix into the larger gaps and letting it settle into a decent if very small fillet. After maybe half an hour of fussing, I stepped away, convinced that continued ministrations would do more harm than good.
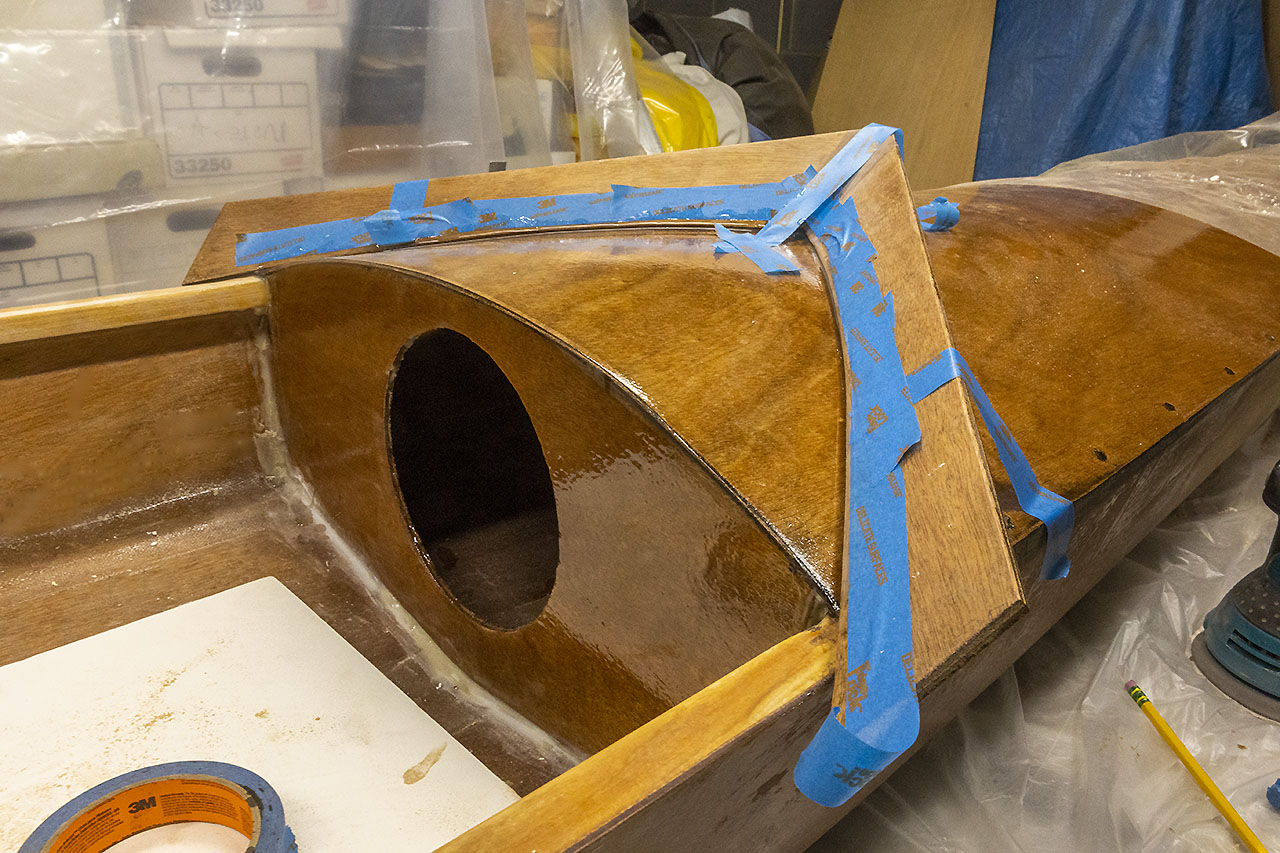
The boomerang waits for its epoxy to cure.
After this began to set up, I removed most of the tape, went over the joint with a fingertip and alcohol to smooth the fillet and clean the surrounding wood. I scuffed it just enough to know it will need a lot more of that. Then I cut and dry-fitted one of the side-panels. It’ll work out. The side pieces are long and awkward to work with, and a little bit of leverage applied at the wrong angle could still spoil the mounting of the boomerang. I’m calling a halt here until the epoxy sets for the ages.