My screw ups continued. After I replaced the not-quite-right bright brass screws with wooden dowels, I wanted to stain the dowels. So I used MinWax Espresso on a 1-inch band all the way around the boat. Looked good! Then I wanted to clean up a few of the edges using mineral spirits. That looked better, especially where the spirits made gradients of the edges. That was an accident, but I ran with it and just blended the stain into the original finish, edge to edge and tips to midships. Boy, did that look!
But it was a mistake. I might have gotten away with the oil-based finish over a limited area when more epoxy was to be coated over both decks. But while blending the stain I basically wiped everything down in mineral spirits. Epoxy will not bond to the oil in the oil-based stain, and the mineral spirits just made things worse.
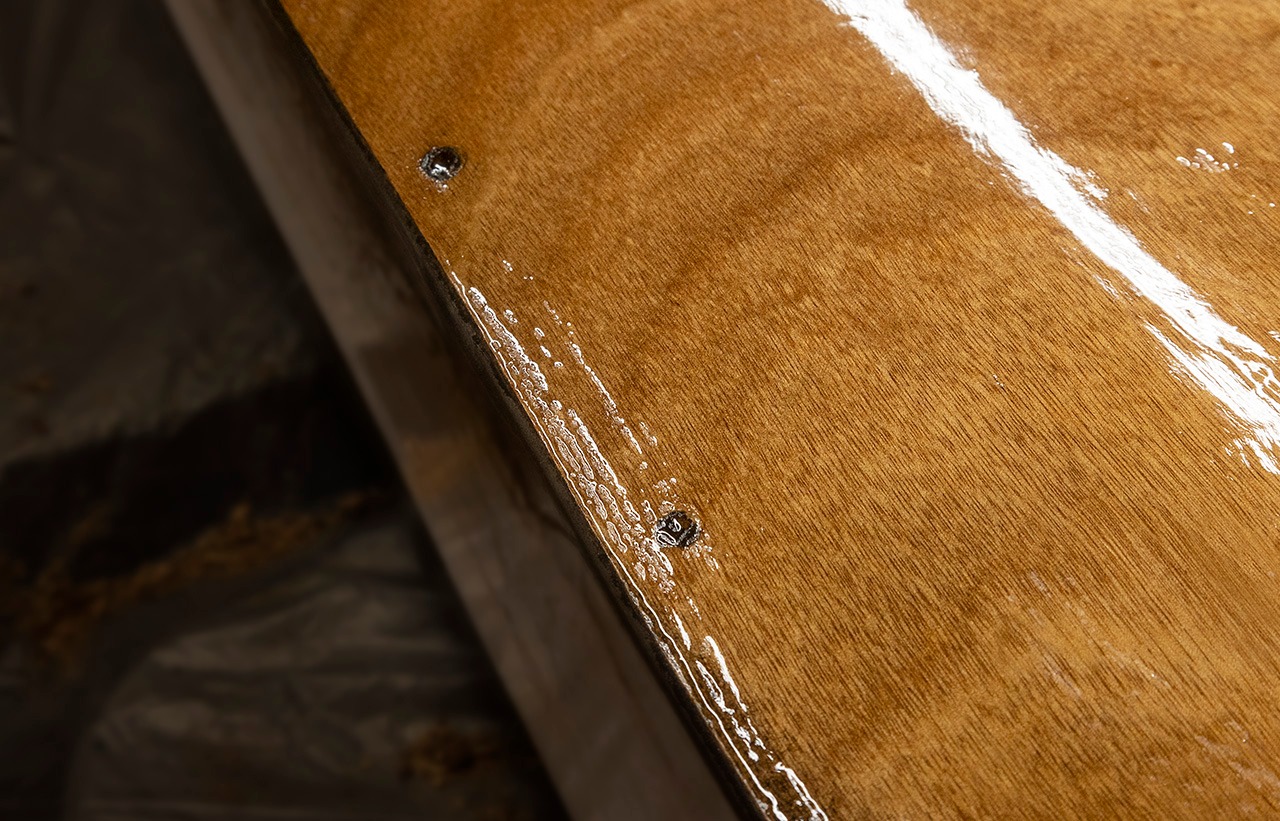
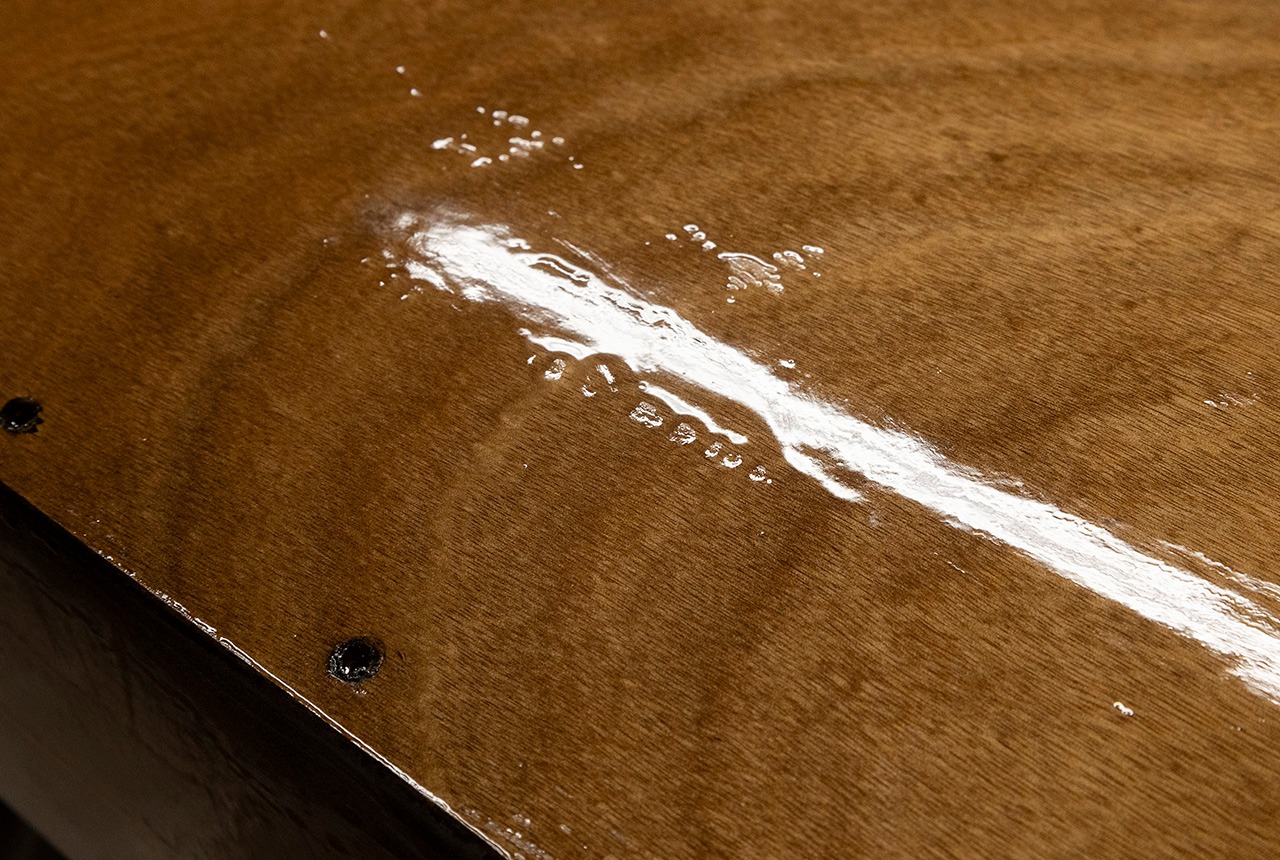
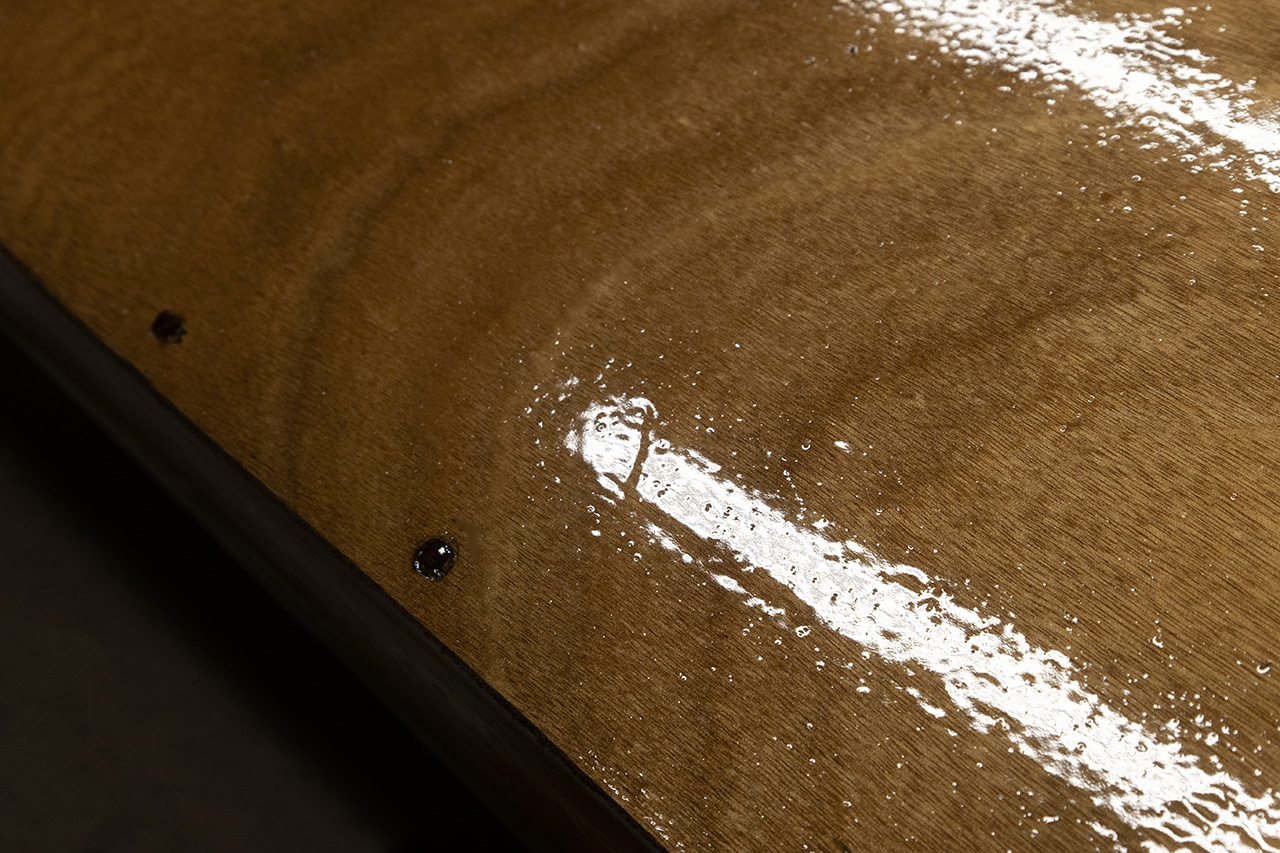
I bought some 100% acetone. After letting the oils and the stain dry, rest, whatever they do for five days, I wiped the boat down with acetone (I tried a test strip to be sure I wasn’t going to attack the color). I’ll do that again after thoroughly scuffing the decks (how aggressively I’ve yet to decide). On the same test strip, I can see that even after wiping with acetone, epoxy does not spread evenly. It forms hills and valleys where it avoids the oiled surfaces. The fix for that is two fold: prepare the surface, and be prepared to apply multiple coats of epoxy, sanding or scruffing in between. (Experts tell me I could apply a sealer to keep the oils below future epoxy layers.) Eventually, I’ll get a smooth surface. I scruffed the surface (320 grit, maroon Scotchbrite pad, 220 sandpaper wrapped around a sponge), and wiped it down with acetone. Then I applied 100/50g of epoxy by pouring it out on the decks and spreading it with a brush. Most of the coverage is fine, but there are these spots:
I sanded the first coat rather cautiously (320 scruff pad and 220 paper wrapped around a sponge, then an acetone wipe down) to keep from damaging the finish underneath, then applied a second, thinner coat using a 1/8-inch roller. It’s a boat, not a table. I used 80/40g to do both the forward deck (with preparation) and the after deck (just a quick 320 scruff). The forward deck, especially, is much improved.
Let’s do it again. The after deck has new problems: high and low spots. After the second coat cured overnight, the epoxy was deep enough for me to use the orbital sander, carefully, to level the surface some (120) and scuff it up (120, 320, acetone) for a third coat. I only cut too deep in one spot, in the copper bow cap, and I can fix that tonight. I used a 1/8 inch roller to cover the whole deck nicely with a still thinner coat (60/30g).
While that third coat was still tacky, I re-applied the copper-tinted bow vanity. I’d been using “copper penny” for such accents; this time I used “liberty copper” which is brighter.
Current thinking: lay on one more coat. Then do the splashbox. Then revisit the hull — there are drips and uneven finishes to deal with. Don’t talk about “finish coats” until just before varnishing the deck. Complete and install the mechanical bits before then.
Day 64
I didn’t photograph coat 3. It didn’t change very much compared to coat 2. I did aggressively sand (120 orbital and Scotch-Brite, Acetone) before coat 4, and I think it will be the last before going on to other issues. Coat 4 was quite heavy (90/45 fore, 35/15 aft), rolled on with a 1/8-inch nap. I am struck every time I scuff with the maroon Scotch-Brite that the wood looks great without the fierce gloss. Maybe it’s lemonade from lemons, but I think (today) that a final matte / satin finish might be the way to go. It’s only the reflections from the high gloss that reveal the issues that have captured my attention these last few days; so maybe just lose them. On the other hand, there’s always another hand.
I prepped the coamings which together comprise the splash box. I sanded away almost all the stains left by tape and long storage, and I eased the edges of the side boards’ lower edges which will be hard to deal with after they are attached. I dry fit the font pieces and adjusted the radius of curvature of the outer few inches of one side. I remain slightly puzzled about placement of the sides. I will probably wait a day or two until I can tape (or epoxy?) the front pieces in place and then position the side boards’ tops to be flush with those.