One scull is structurally finished. It’s not aesthetically finished, but all the parts are drilled, cut, epoxied and assembled. It is curing, and that won’t take long since I used all fast hardener (15g + 30g resin) in the interests of seeing how this works out tonight.
I’d earlier cut the sleeves into identical lengths so I don’t ever have to worry about which scull is which — I can assemble the sculls without thinking about which blade goes on which shaft.
Here’s the recipe in excruciating and perhaps excessive detail:
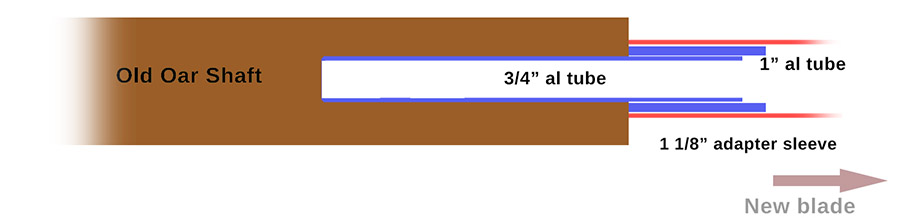
(1) Drill 4 inches into the end of an old oar shaft. Start with a 3/8-inch spiral bit, expand the hole with a 1/2-inch spiral and finish with a 3/4-inch spade. (I tried going straight to the 3/4-inch spiral right after drilling the 3/8-inch pilot hole, but there was no holding the oar shaft. Try a much smaller pilot hole, and then start with the spade. I doubt I can proceed straight ahead, but that might produce a better start for the major boring later. [Ha! See below. Small pilot hole then the spade is just the way to do it.]
(2) Cut ~6 inches of 3/4-inch EMT.
(3) Cut 2.5 inches of 1-inch O.D, aluminum, 0.125-inch wall tubing.
(4) Dip the blade end of the EMT in unthickened epoxy.
(5) Insert the epoxy coated end of the EMT into the 1-inch aluminum tube. Work it all around.
(6) Coat the outside of the 1-inch tube with unthickened epoxy and work that all around inside the sleeve. The sleeve and these tubes will be permanent parts of the oar shaft.
(7) Thicken the remaining epoxy with wood floor and pour it into the hole in the old oar.
(8) Plunge the EMT into the hole. Skootch that around some, too.
(9) Push all the tubes into place; make sure the 1-inch aluminum and the sleeve are butted up against the end of the old shaft.
(10) Stand the shaft upright and let the epoxy cure.
You might recognize that rendition as a stubby version of Plan E from a day or so back. A photo of the work in progress will come soon assuming this worked (by which I mean, does it feel solid; has it any play; or does it fall apart in my hands?). I’ll do some play-by-play photos as I assemble the second scull.
It worked great!
The promised show and tell:
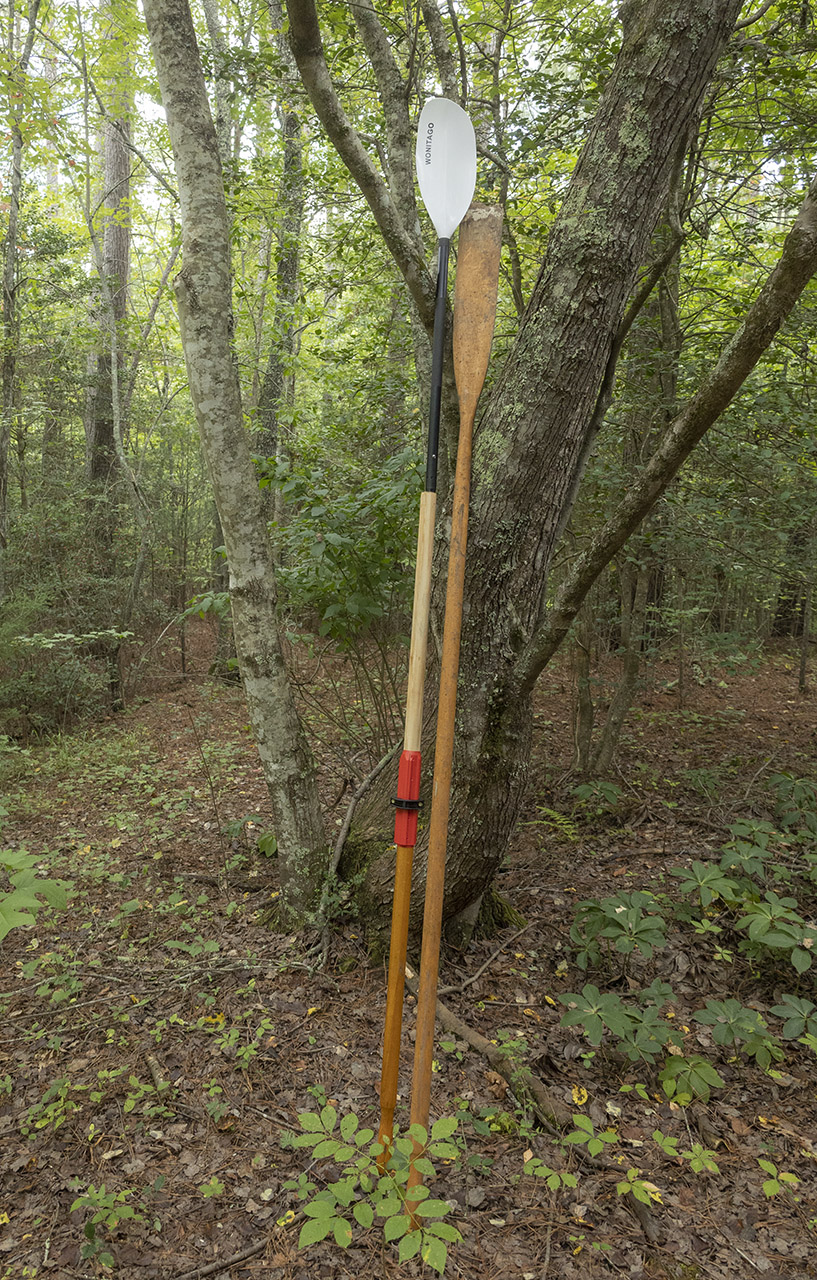
but a functional scull and the beater oar whence cometh it.
What do I know? It appears to have worked great. The finished scull with asymmetric blade snapped in place is 9’8″ long which is two inches longer than standard. That was not an accident. I did that because the blade is smaller than most and because I expect my preferred cruising pace to be at a much lower stroke rates than any youngster’s go-fast rate. So tall gearing seemed in order. I’ll trade “explosive acceleration” for “relaxed cruise” any day (remember your first Kawasaki? like that). Also, if it proves advantageous, I can shorten the sculls in a few different ways, and each is easier than making them longer. I did not manage to center the hole in the old shaft worth a damn, but I don’t think that will matter.
It occurs to me that the extra holes in the adjustable-for-kayaking paddle shafts will need to be sealed / covered / plugged lest the end of one oar take on water.
The first scull weighs 4.8 pounds which compares favorably to all-wood sculls, and unfavorably to carbon (“…wooden oars weigh about 6 lbs each. They are heavier than the carbon oars, which weigh about 3.5 lbs each” writes Adirondack Rowing Center). The price of mine is not to be beat and not for lack of trying. Tomorrow, I will do it all again. And some time after I hit the water, I will probably find out why hybrid sculls like these are not a thing.
Day 56
I photographed some key stages in the production of the second scull.
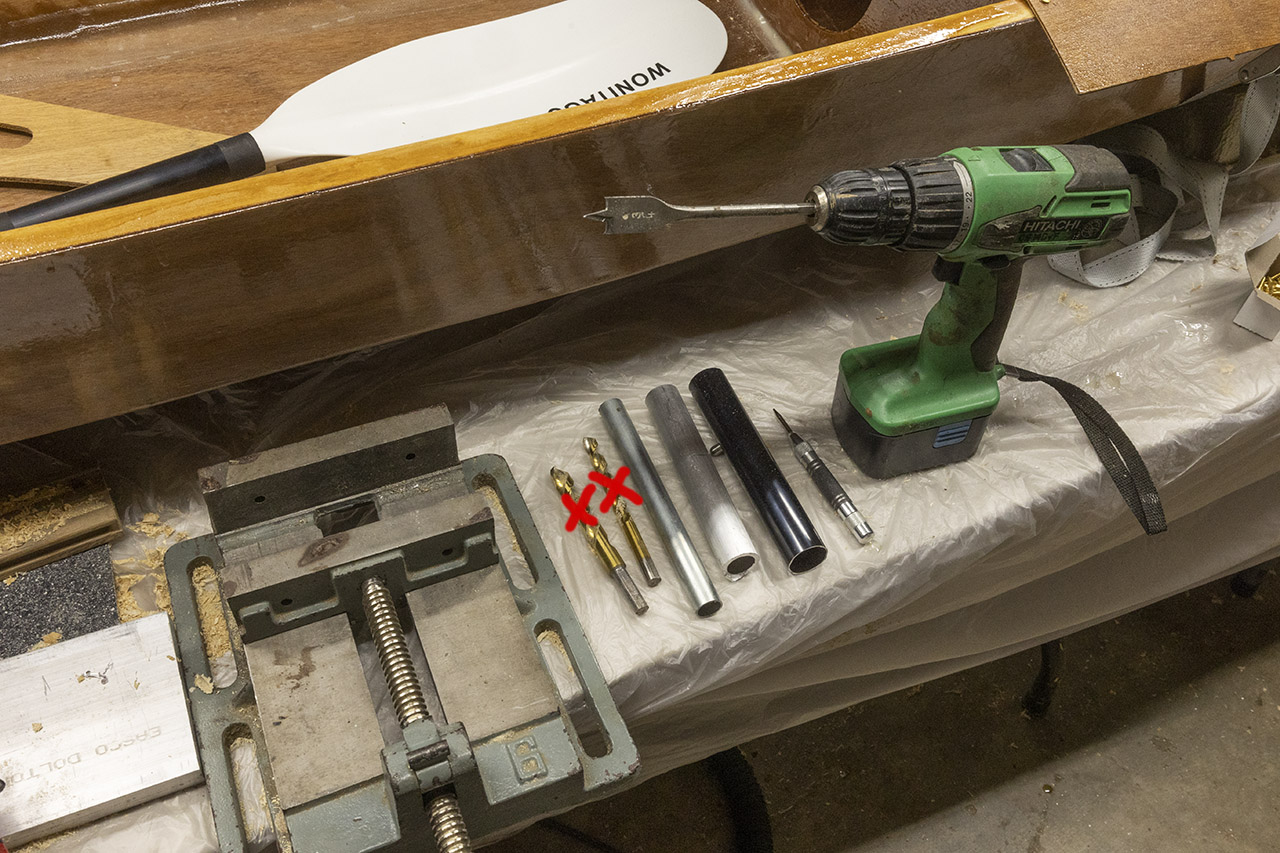
Ad hoc horizontal drilling jig to help bore out the old oar. The two spiral bits weren’t used for number two. Left to right after the struck out bits: EMT, just a little long still; 1-inch thick-walled aluminum tube, very much too long still; a sleeve into which the 1-inch tube slips and over which the removable blade slips/ Note locking pin in the sleeve attached to a spring inside.
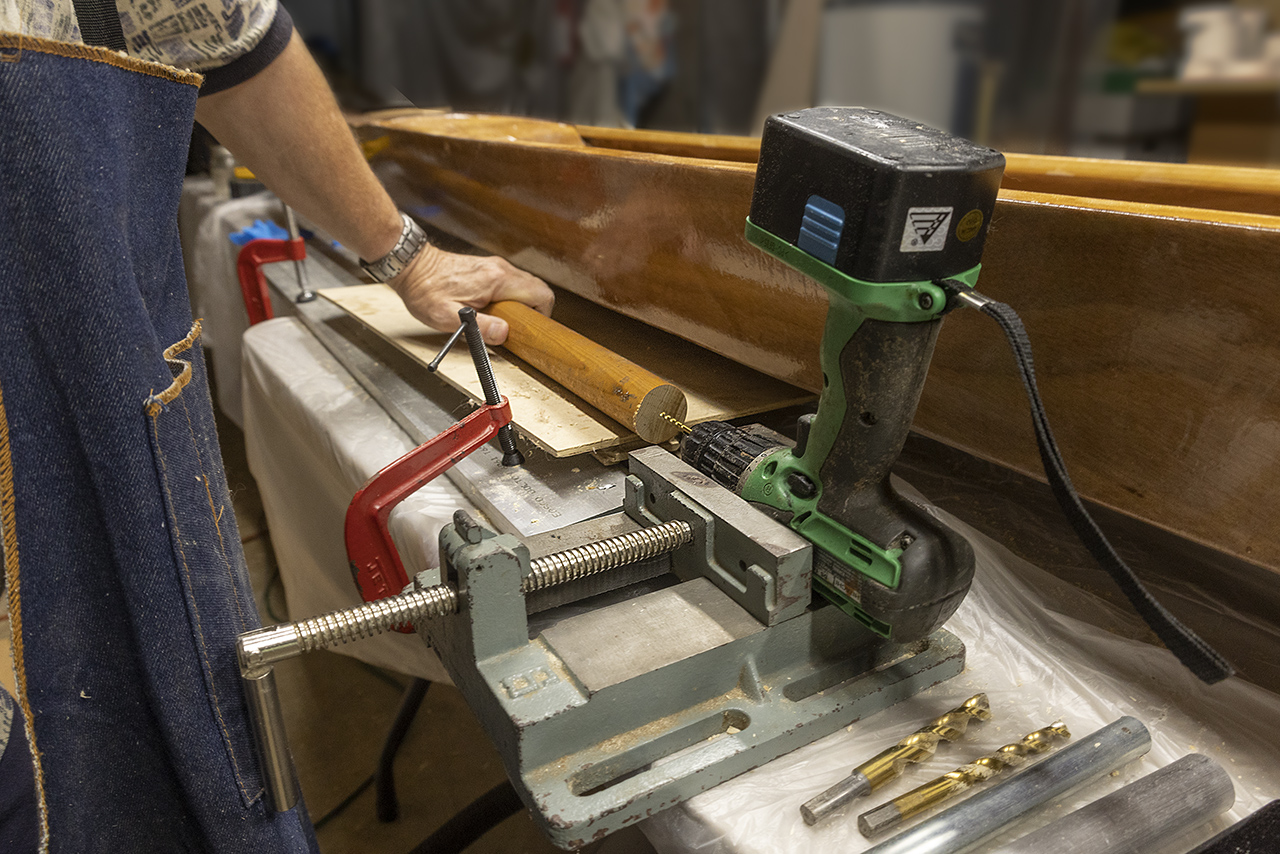
Drilling the pilot hole (something like 5/32’s) to get the spade bit started straight. Oak and plywood lift the oar to the right height; a layer of pebbled Formica provides a sliding surface (thank you, John Dobson); a substantial aluminum bar clamped to the table provides a guide to feed the oar into the hand drill which is clamped in a drill-press vice.

It’s still not on center, but it’ll do. Really. The 3/4-inch spade bit needs to go 4 inches into the old oar. It cut quite easily and smoothly. Surprise!
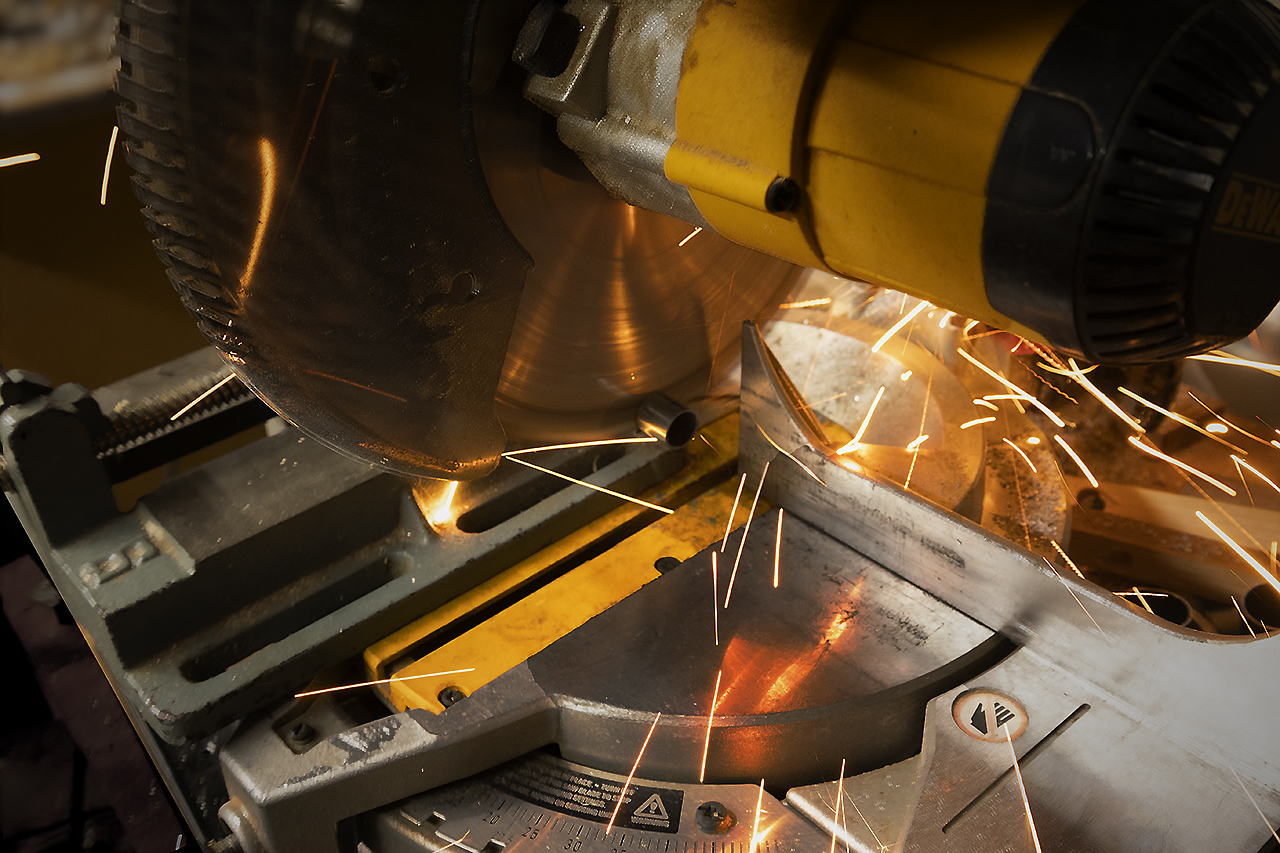
Cutting EMT is exciting. I shortened a scrap of 3/4-inch EMT to just over 6 inches. I wanted about 4 inches inside the old oar and about 2 inches protruding. The exact length doesn’t influence the overall length of the scull or the extension of the blade, but it cannot be allowed to interfere with the spring mechanism that releases and holds the blades.
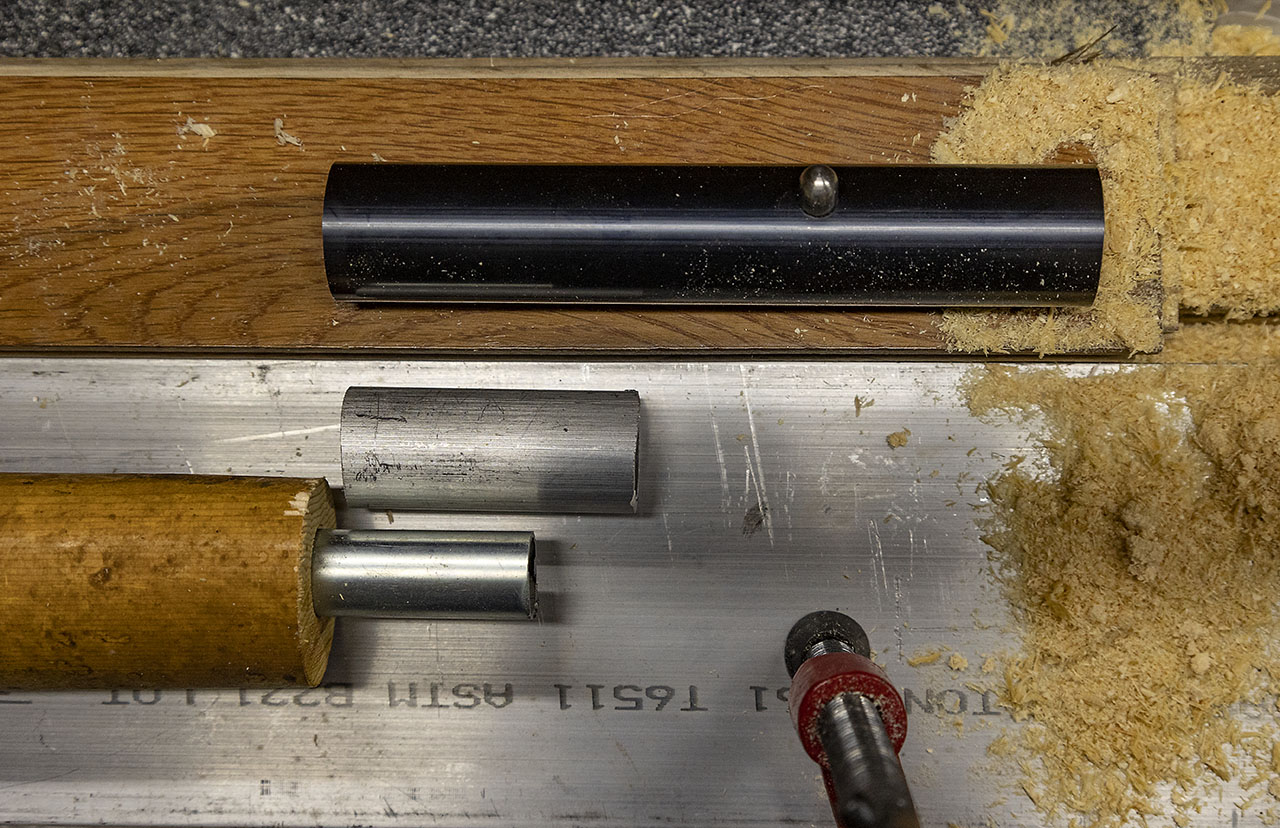
At bottom, the EMT is inserted in the old oar shaft; the 1-inch aluminum tube that will fit over it is above it; the sleeve that adapts the blades of a take-apart paddle is at top. The spring that controls that button extends to the left inside the sleeve. I could have probably anticipated all this better and been able to use a longer 1-inch tube or left more of the adapter sleeve to support the removable blade, but I wanted the two sculls to be dimensionally identical so that there’s no fiddling with which blade goes on which shaft. I’d already made decisions about the first scull, and it seemed more important that this one match than that it be fully optimized from an engineering p.o.v.
Practice may not make perfect, but it does make quicker: scull #2 took about 45 minutes, even with time outs for photos.
I opted to leave the inboard portion natural wood and to paint the outboard portion of the oar shaft to match the black connecting hardware. Where I had sanded the oar shafts, I first painted them with epoxy, gave it a couple of hours to almost cure, then hit them with Rustoleum spray paint (“universal paint and primer, satin”). The sleeve will cover the transition. I suppose I’ll need to wax everything, just because. The color scheme let’s me maintain a reasonably formal, traditional “office” while borrowing from a more modern aesthetic farther out. It should be dramatic and easy to maintain. We’ll see. They’re neither as elegant as traditional wood nor as light as modern carbon, but they’re on the order of $600 cheaper, and they’ll do at least until I have some informed preferences. That’ll pay for a lot of epoxy and varnish and this and that.