The next big step should be joining the side panels at the bow and stern. I’ll need to set the bottom pieces aside to make enough room on the work table and will wait to do that. I glued the scarfs in the bottom panels late yesterday afternoon. Since then, the air has been its usual low 60s. The “witness pot” says the epoxy is well set, but I’d rather not chance it.
I did scoot the pieces around just enough to measure and trim the excess length from the sheer clamps glued to the side panels. From one of the leftovers, I cut the 20-inch spacer I’ll use to spread the panels in subsequent steps.
I’ll need to smooth the scarfs on the outside of the hull. They’re probably fine, but after I join the panels, they’ll be harder to clean up. Leave the ones on the inside alone; they’ll be OK as they are. The ones on the outside, where boat meets water, need to be as smooth as possible. Does it matter? Probably not; there’ll be glass and resin over the entire hull and much more sanding between today and rowing. But it can’t hurt.
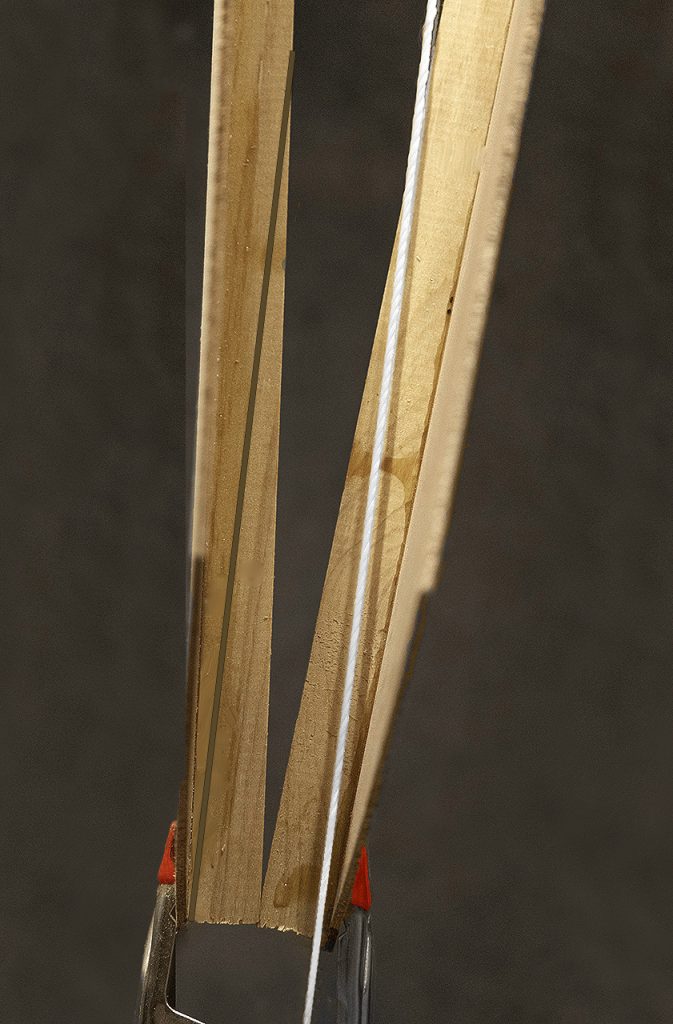
Then I got down to it. I clamped the bow and stern side panels together, sheer clamps down and inserted the 20-inch spreader near the middle of the future boat. A ran a taut string from the center of each end to the inside edge of the side panels at the other end of the hull and marked the tapers where the string passed over each sheer clamp. Thus:
Fine finish saw or planer? Decide tomorrow.
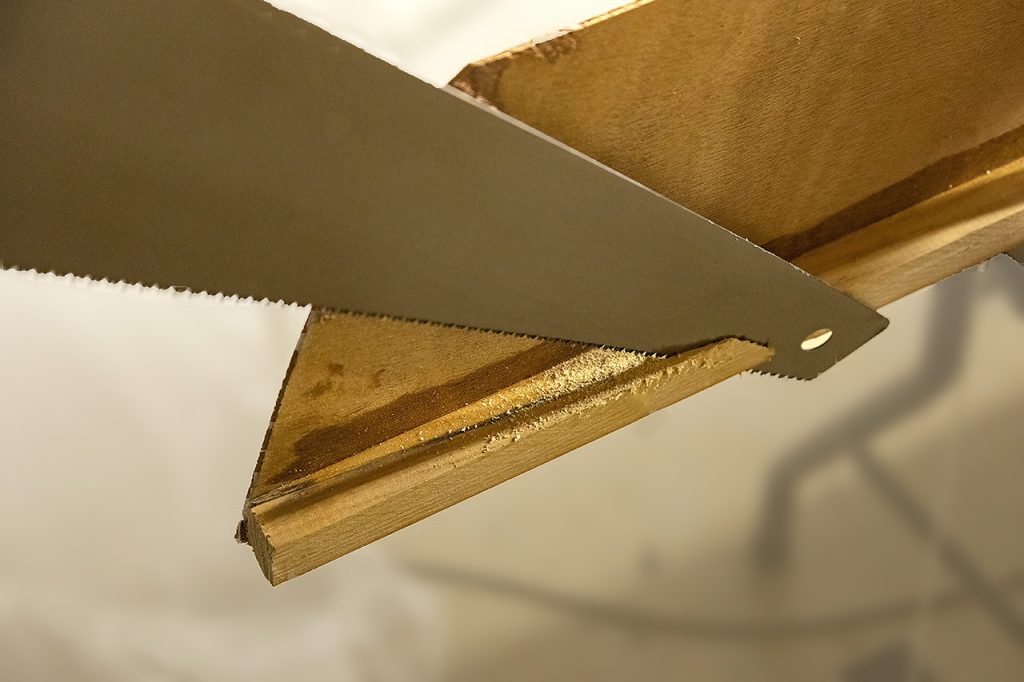
I stood each side panel on edge, sheer clamp down, using whatever weights were handy to brace it. Then I found a suitable clamp to hold the sheer clamp to the work table. I immobilized each end of each sheer clamp one at a time and sawed the tapers. It’s just a matter of getting the cut started with a fine-finish saw and proceeding smoothly to the end of the sheer clamp more or less along the marked line.
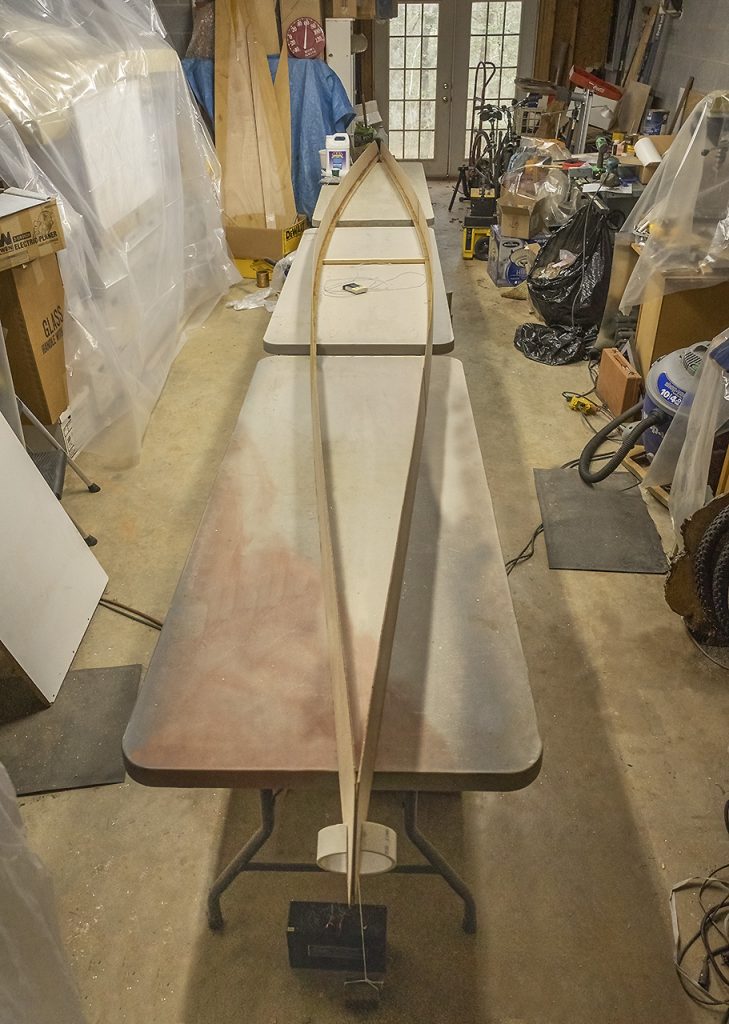
Really, it’s not all that critical. The closer to smooth the better, but sandpaper will lower parts that are too high, and thickened epoxy will fill in the bits that are too low. I dry fitted the ends for plausibility; they’ll get more attention later on. I put the 20-inch brace back in place and clamped the ends together lightly, just to have a look. The project begins to resemble a boat. Voila!
Are the tapers perfect? They are not, but they are perfectable. I took the the side panels apart, drew a pencil line parallel to and 3/8 inch inside their chine edges, then stacked them out of the way (but first I sanded smooth those offensive scarfs mentioned way up above; they cleaned up well).
The bottom panels
I returned the bottom panels to the workbench, stacked them precisely atop each other (again), and taped them together. I drew a line 3/8 inch inside their entire perimeter. I’ll drill holes for copper wire (the stitches in “stitch and glue”) along all these lines. Here’s a nifty improvised tool I threw together to make drawing such lines quick and easy.
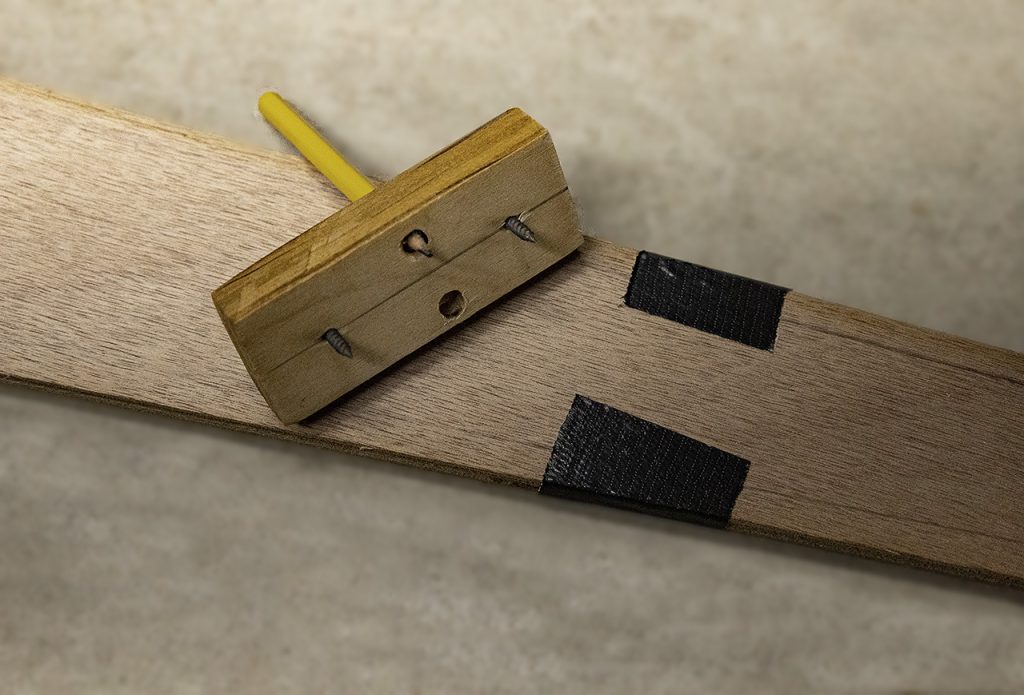
the edge of the piece, and the pencil draws a line the specified distance away.
…
eBay could surely turn up antique versions from New England woodworking shops. (Yessir: look for “Mortise Gauge” or scribe, or “Marking Gauge,” and you’ll find them new, old, at every conceivable price, of every age, and sophistication.)
In the evening, I marked and drilled 1/16 inch holes four inches apart on this line all the way around the bottom panels. That small a bit just punches through two layers of 4mm plywood without apparent resistance. Zip, zip, zip. Then I wired the bottom panels together along the keel line. When 8 or 10 stitches were in place, I opened the panels to see if I was leaving enough slack. Mostly, yes, I was slightly more generous with most subsequent stitches, but I think all is well. [Ha! I was wrong. There’s 3/4 inch of wood in the “spine” between the holes plus a little slop. 50-60 stitches, no matter how weak individually, will not let the panels open up if they’re not very, very loose.] So long as the wire stays in place, no matter how loose, it will just need to be tightened; and if a / a few / some wires do fall out, just re-thread and tighten them. I spent an hour doing the rest of the stitches (about 60 in all).
Pay heed! The stitches in the next photo are much too tight for this stage!
Way too tight.
…
Fortunately, I made an unconscious habit of always twisting the stitches clockwise to tighten (“fortunate” because that made it much easier to loosen them right down the line just a little later; see Day 8). Don’t scrimp on the copper: use enough to have the slack you need. Use lots, else you’ll have to use more to replace too short stitches (“It saves money because it costs money…”).
As I made my way around the project, I got rid of the small protuberances where the CLC’s CNC machinery left “tabs” from sheets of plywood. These little warts are souvenirs of the production line. They come about every four or five feet, are maybe 1/8 inch tall and a quarter inch wide. They trim off easily, and maybe they are of no consequence, but slicing them away may help avoid nuisances later. Can’t hurt.
Since yesterday, cutting, drilling, and stitching have each proved less intimidating than expected. Fiberglassing is yet to come, and varnishing, with who knows what surprises. But there is real hope for this project. (For the ledger: denatured alcohol, nitrile gloves, and stirring sticks in anticipation of lots of epoxy work: $37.)
Tomorrow
Finish the tapers with sandpaper or plane. Stitch the bow and stern together loosely. Don’t glue anything until 100% certain. Prepare to mate the bottom and side panels.