And suddenly… it’s a boat!
It’s a long way from lake-worthy, but it’s rigid and shaped right and looks like what it is. I’m going to let it sit mostly undisturbed until tomorrow, because the epoxy holding the seams really needs to be completely cured, and the pieces need to stay exactly where they are.
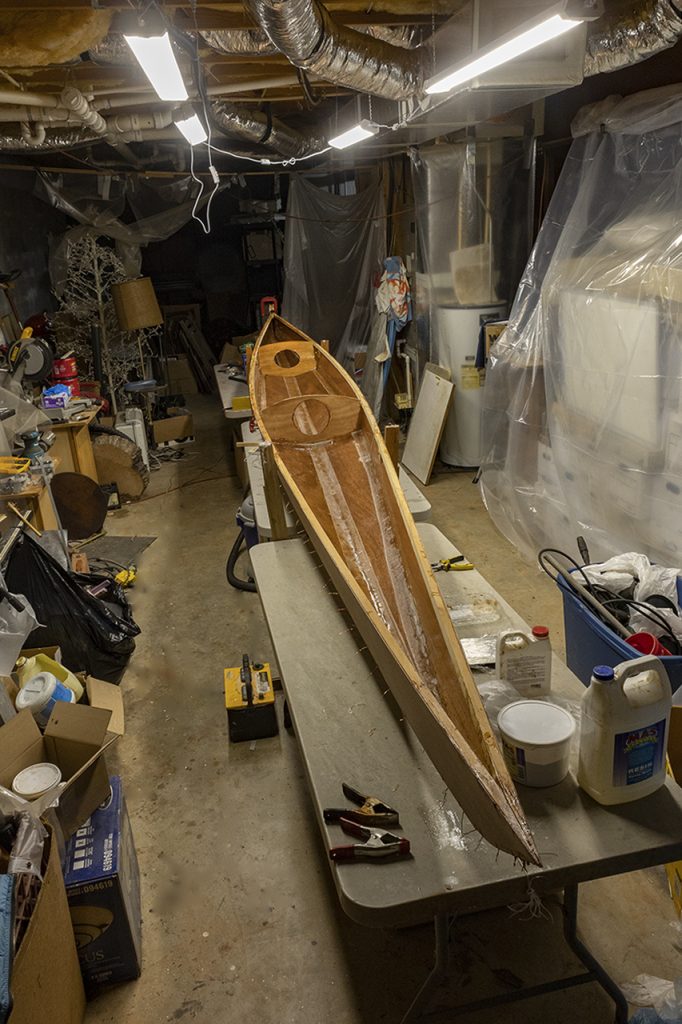
That said, I made a point of getting some glass and epoxy into the extreme ends. I borrowed some ancient advice from Phoenix Boat Company about sealing the ends of their kayak kits (which I last did along about 1977, or 8, or 9). I chopped up 8-10 inches of fiberglass tape and stirred the mulch into a thick mix of epoxy (100g, 47g, lots of wood flour). I made a tool from a wooden dowel and a scrap wedge. I wrapped that in a generous length of shipping tape (to discourage bonding to the tool). Then I stuffed a few golf-ball-sized wads of the thick, glass-infused goop into the bow and stern, pressing each into place using the cellophane-wrapped stick and sometimes smoothing what I could reach with my gloved fingers. “End pours” are crude and unlovely, but they have served my kayaks well for ~45 years.
…
Before you ask: the massive battery in the picture is there to keep me from kicking, repeatedly, the bottom of the supports that hold the boat upright.
I added some tape to the remaining uncovered seams / fillets, touched up the uncoated inner surfaces, and added short strips of epoxy-soaked tape to fill some of the space between the bulkheads and the bottom panels, the better to provide surfaces for reasonable fillets some fine day (more about the need for that to come). After all the new stuff cures — and the old stuff really cures — I’ll remove the few screws holding things together. Screws remain in the ends of the sheer clamps and in the tabs fixing the boat to the vertical supports. The small areas under those tabs need an epoxy coat.
Anybody who’s built a stitch & glue boat will look at the exposed “ribs” of this one and think, “Well, he had to start somewhere. Maybe his next project will be better.” That’s why those people are not often welcome in my boatyard. This one is lovely.
Tomorrow
I’ll do those last epoxy bits. The day after that, I’ll flip the boat over and clip off all the stitches that I spent days putting in. Then begins filling and sanding, which may take — who am I kidding? which will take — a while. But wait, I just found
Today’s mistake
which was not noticing that there’s supposed to be a second layer of tape over the joints. I stared at the roll of extra tape and thought how uncharacteristic that amount of surplus seemed. I found my mistake in the middle of the night (“then put down a second layer of tape” say the instructions) when I was not anxious to tackle the fix. A quick trip to the forum says all is not lost. In fact, some builders advocate waiting up to 24 hours to do the second strips. Sand the original tape a bit, and proceed. OK. Sleep first, sand later.