Let’s get started. FedEx handed me the epoxy from MAS on Monday morning. In the afternoon, I straightened up a little more, lined up some tools and supplies, and dry fit the sheer clamps. They were each shipped from Chesapeake Light Craft as two bundles of three sticks. The middle stick is scarfed at both ends; each of the two end pieces is scarfed at one end. The idea is to slather mixed epoxy on the scarfed faces, clamp them together, wait 24 hours, and by then the six pieces had better act exactly like two very long pieces of wood. (I am reminded that this is a very long boat. The assembled sheer clamps are something over 22 feet long.)
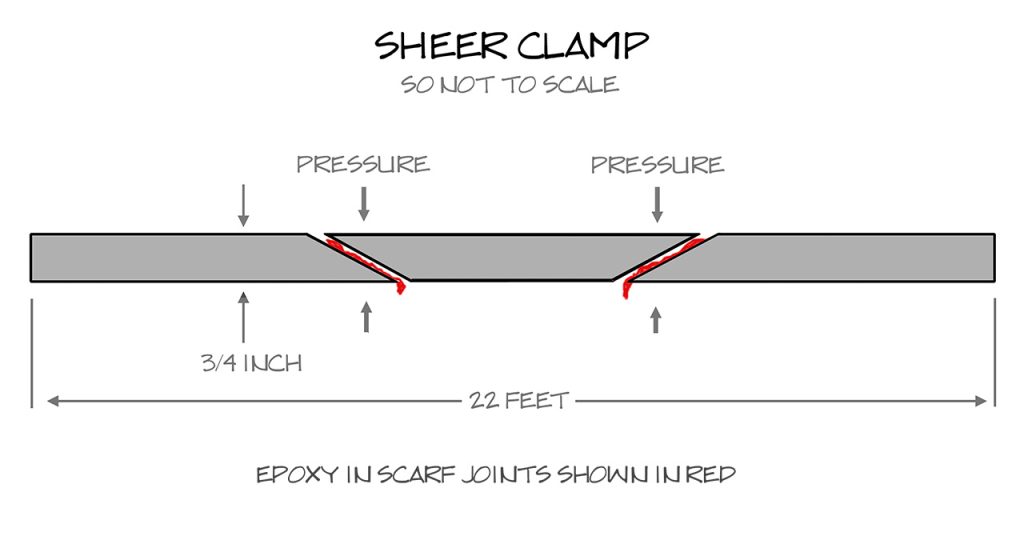
The scarf joints are actually about six inches long; there’s plenty of well-matched surface ready to be bonded. At the same time I glue the sheer clamps, I can do the same for the hull’s side panels: clear some space on the work bench, lay them out, paint epoxy onto their scarfs, apply pressure and wait for them to meld into two continuous hull pieces. (The instructions want me to do the bottom panels at the same time; I’ll wait. There’s just not that much room on these tables; the bottom panels require alignment by offsets against a linear datum (string, laser, something…) and I don’t want to get in a hurry or get more confused.)
Put a sheet of plastic under each joint to keep the boat parts from becoming part of the workbench. Clamp or weight every bonded piece, and then leave everything the hell alone.
When all these joints are cured (24 hours, maybe a little more), glue the sheer clamps to the top inside edge of the hull pieces. (Make more clamps first.)
If I get started at this tomorrow midday, these steps should be done in 50 – 55 hours, or sometime Thursday afternoon or evening. I can do the bottom panels on Friday and maybe start some stitching this weekend. It’s a plan. Step by step…
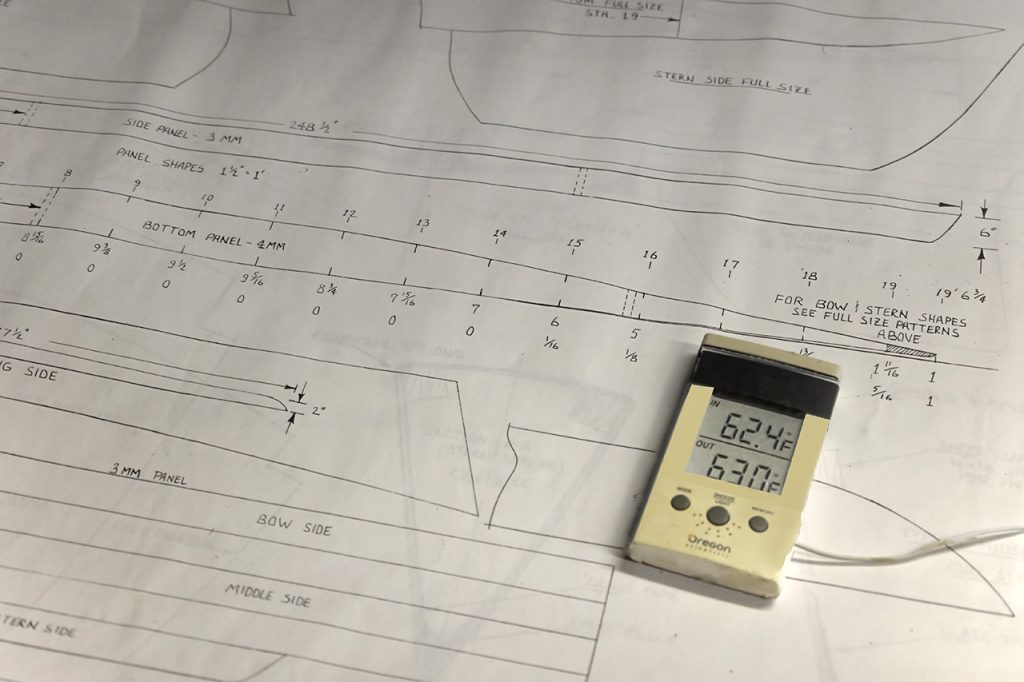
… except now it is tomorrow, but the temperature in the shop has followed the outside temperature and is just a little too cool. Since one of the reasons for wanting to get on with gluing the sheer clamps is to see how the epoxy works, it makes little sense to start under marginal or abnormal conditions. Tomorrow’s high is predicted to be better, and the next day’s better still. I’ll wait. I can still sort out some parts and do more shop prep.
I got out my old 2:1 dispensing spigots. Then I read the labels on both parts of the new epoxy. Uh-oh.
A Goof:
The resin said to use 5 parts resin to 1 part hardener. Or 3 parts resin to 1 part of a different hardener. And the hardener said to use 2 parts of some different resin to 1 part hardener. One of them must be wrong.
So it turns out that this resin is not compatible with this hardener. Or, if you prefer, vice versa. “Traditional Marine Resin” does not want “Slow Hardener.” It wants “Slow Marine Hardener” or “Fast Marine Hardener” or “Clear Marine Hardener” depending. If you take it the other way around, then this hardener wants LV (Low Viscosity) resin or a FLAG (Fill, Laminate, And Glue) resin. Now, knowing this, a closer look at the CLC kit reveals that CLC’s resin of choice is LV.
Apart from that one obvious tiny little baby little hiccup, everything went well today.
Late this afternoon, I ordered two new hardeners to go with the Traditional Marine Resin. One is its preferred “slow marine hardener” (1 quart, to be used at 5:1) for the structural joinery. The other is its matching “clear” hardener (2/3 pint, to be used 3:1) with less bonding mojo but better aesthetics when used to seal the deck and splashbox. I ordered 5:1 spigots for the many times I’m going to need that critical fiddly structural mix. And I found on the MAS website a calculator to use weight ratios instead of volume ratios which should make small pours very precise. The little digital kitchen scale will see good use when it comes to mixing up tres-beautiful goop. Finally, MAS appears to be OK with my returning the unopened “Slow Hardener.” That’s no small thing, since otherwise this would be about a $90 oops. I waited till I was over the excitement to request an RMA. [For the ledger: let’s wait and see how the return goes.]
A SNAFU?
It goes increasingly complicated, that’s how it goes. The shipment of the new hardeners was “cancelled by sender” after being marked “shipped.” And as it happens the RMA# in the body of the message MAS sent me is not the same as the one in the address they asked me to use. I messaged MAS to straighten out the resin / hardener thing — either way. We’ll deal with the RMA next. I have a couple of weeks for that, and lots of options are in play. Ninety bucks here, eighty over there… pretty soon you’re talking real money.
An Experiment:
You know what? I got out the epoxy and hardener from the 2010 kit. Maybe it’s OK. Maybe it’s just fine. I understood a lot of online comments to say it was hopeless or at least foolish, but maybe it’s not. There’s no reason not to at least try it out. The resin is clear and colorless; the hardener is clear and yellow. I found sites that reassure me that yellowing in the hardener just doesn’t matter. Maybe it’ll be good for “emergencies,” or maybe it’ll be good for sealing if not for structure. It’s at least good for practice.
I mixed up a small amount (22 grams of resin, 10 of hardener) and stirred it for a few minutes in a small plastic cup. I heated it briefly in a warm water bath (yes, that works quickly to make it less viscous), and then spread it between some wood scraps. It doesn’t take much! I clamped one pair, put weight on the other. Where epoxy overflowed, I wrapped the assembly in the plastic I hope to use to protect work surfaces. If these bonds are solid in ~24 hours, I’ll try painting a bit of plywood with another mix to see how it behaves as a sealer. If all works out, then I at least have spare epoxy, and I just might be in business. I’ll straighten the business business out soon. Right now, it feels good to be doing anything.
The experiment:
March 31, 14:20. Clamped. 62.5°F
March 31, 15:40. Weighted pieces still mobile; leftovers are a thick gel.
March 31, 22:40. Wood bits do not move; pot is firm; metal tools can dent it.
April 1, 00:05. Pretty damn solid! Metal tools barely mark leftover epoxy.
April 1, 10:30. Doubts dispelled. Twenty hours and ten minutes.
If all is as I now expect it to be tomorrow afternoon, then I’ll arrange to return all the new stuff to MAS and buy what I need if and when I do need it: “Your epoxy is too good! Its shelf life is fabulous.” It’ll cost a lot of postage to send stuff back to Minnesota, but not nearly as much as it would cost to keep it. Dang, this is mostly a pleasant surprise.
Thus encouraged — I’ll need them sooner or later in any event — I ordered nitrile gloves, stirring sticks, and denatured alcohol from Amazon. All that is in anticipation of working with thickened fillets and taped seams a week or so after I get going which I may well do April Fool’s Day. (There’s a reason comments are turned off.)
And a Pep-talk:
Keep some things in mind: you’re going to varnish the deck. The cockpit and the hull will be coated with white Pettit EasyPoxy. You might, or might not, want to thin the old Schooner Gold varnish with Interlux 333 (or some more common agent) before applying it (assuming it works at all). Just wait and see. The first time you try to wet out fiberglass will not be the big hull drapery. A healthy dose of seam taping comes first. You’ll know what you’re up against by the time you have to deal with acres of glass. You do not have to figure everything out weeks ahead of time. Don’t panic now because you don’t already know everything about this process!